RV Generator Troubleshooting: Common Problems and How to Fix Them
Updated:
Nine times out of ten, an RV generator that won’t start has a stale fuel problem. If your generator hasn’t run in more than 30 days, degraded gasoline is likely gumming up the carburetor and preventing ignition. Before you panic or call for expensive roadside service, try this: turn on the generator’s fuel valve (if it has one), switch the unit to “run,” and pull the starter cord or press the start button while giving it a minute to prime. If you hear the engine turning but no ignition, you’re probably dealing with old fuel or a clogged fuel system.
I’m Charles, and I’ve spent years helping DIY enthusiasts solve power problems in off-grid setups and RVs. Generators are lifelines when you’re away from shore power, so I know how frustrating it is when yours goes silent right before a weekend trip or in the middle of a camping adventure. The good news? Most generator failures stem from a handful of common, fixable issues that don’t require a mechanic.
This guide walks you through a symptom-based troubleshooting process, starting with the fastest checks and moving into slightly more involved fixes. We’ll cover everything from fuel system clogs and oil sensor shutdowns to spark plug failures and circuit breaker trips. You’ll also learn when a problem is beyond DIY repair and requires professional help, especially with inverter models or propane systems. By the end, you’ll have a clear prevention plan to keep your generator humming reliably for every adventure ahead.
Key Takeaway: Most error codes resolve with simple resets or basic fixes, check your manual’s code chart, address the underlying issue (add oil, clear an overload, let it cool), then reset by switching the generator off for 30 seconds. Persistent codes after fixing the cause usually mean a sensor or control board problem requiring professional diagnosis.
Quick Diagnosis: What’s Your RV Generator Telling You?
Your generator’s symptoms point you straight to the solution, if you know what to listen for. Instead of random part swapping, spend two minutes observing what your generator actually does (or doesn’t do) when you try to start it. That observation narrows your troubleshooting from dozens of possible causes down to two or three likely culprits.
Here’s what different symptoms typically mean:
Cranks but won’t startUsually fuel delivery, spark, or air supply issues
Starts then dies within secondsOften low oil sensor activation or fuel starvation
Runs fine but no power from outletsCircuit breaker tripped, overload condition, or AC output component failure
Unusual chugging, knocking, or squealing noisesMechanical problems that need immediate attention before further damage occurs
Display shows error codeSpecific fault detected by control system, requiring code lookup in your manual
Starter clicks but engine won’t turn overDead or weak battery, corroded connections, or starter motor failure
Complete silence when you press startPower not reaching the starter, faulty switch, or blown fuse
Pay attention to recent changes too. Did you just fill the tank? Contaminated fuel might be the issue. Has the generator sat unused for three months? Stale gas or a stuck carburetor float could be your problem. Notice the oil level warning light? That low-oil shutdown sensor might have saved your engine.
Write down exactly what happens, the sequence matters. “Started fine, ran for ten minutes, then shut off and won’t restart” tells a completely different story than “won’t start at all.” That timeline helps you (and any technician you might call) zero in on the root cause fast. Most RV generator problems fall into predictable patterns once you match your symptoms to the right category.
The Most Common Culprits Behind RV Generator Problems
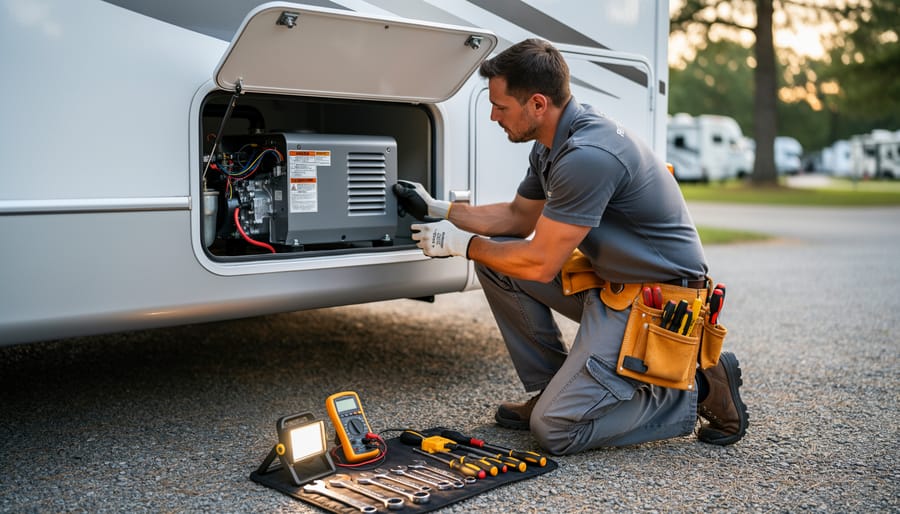
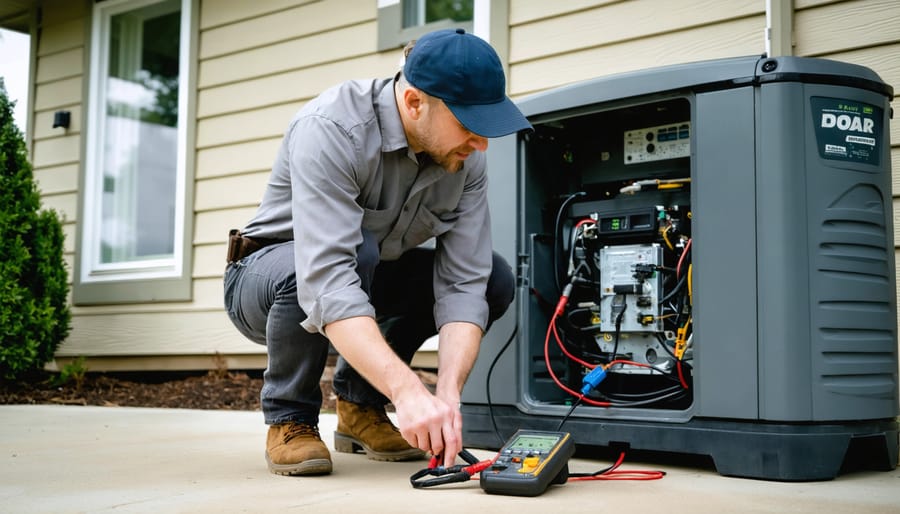
An RV generator technician checks the open generator compartment with essential tools ready, setting the tone for fix-first, DIY troubleshooting.
Most RV generator failures trace back to a handful of predictable problems. Understanding these common culprits helps you diagnose issues faster and avoid unnecessary repairs. The RV context matters here because generators often sit dormant for weeks or months, experience temperature swings during storage, and deal with vibration from travel, conditions that accelerate certain failure modes.
Problem
Likelihood
Difficulty to Fix
Typical Symptoms
Stale fuel or empty tank
Common
Easy
Won’t start, sputters, runs rough
Low or dirty oil
Common
Easy
Won’t start, shuts down immediately
Dead or weak battery
Common
Easy
No response, slow cranking
Clogged air filter
Occasional
Easy
Hard starting, black exhaust, loss of power
Fouled spark plug
Occasional
Moderate
Won’t start, misfiring, rough idle
Circuit breaker tripped from overload
Common
Easy
Runs but no power output
Fuel problems top the list because gasoline degrades within 30 days without stabilizer. When your RV sits between trips, fuel oxidizes and leaves varnish deposits that clog jets and carburetors. Running the tank completely dry creates air pockets that require priming before the generator will restart.
Oil-related shutdowns happen frequently because RV generators include low-oil safety sensors. Road vibration can cause oil to slosh away from the sensor, triggering a false shutdown even when levels are adequate. Dirty oil from extended use intervals thickens and fails to lubricate properly.
Battery issues emerge after winter storage or when house batteries discharge. The generator’s starter motor draws significant current, and weak batteries struggle to crank the engine fast enough for ignition.
Air filters accumulate dust, pollen, and debris faster in RVs than home standby generators because of travel and varied camping environments. A blocked filter starves the engine of oxygen, causing incomplete combustion and performance loss.
Spark plugs foul from short, infrequent run cycles that never let the engine reach full operating temperature. Carbon builds up, fouling the electrode and preventing reliable ignition.
Overload situations occur when you plug in too many appliances simultaneously or forget to use a surge protector with sensitive electronics that can trip breakers. Most RV generators handle 2,800-4,000 watts, less than household circuits, so air conditioners, microwaves, and electric water heaters running together easily exceed capacity.
Control board failures remain rare but increase with age and moisture exposure. These electronic components regulate voltage output and engine speed, and symptoms often mimic simpler problems, which is why you should rule out mechanical issues first.
Step-by-Step RV Generator Troubleshooting
Start With the Basics: Fuel, Oil, and Battery
Most generator problems trace back to three simple things: fuel, oil, and battery. Before you tear apart your generator or call for service, spend fifteen minutes checking these basics. I’ve watched countless RVers (myself included) waste hours chasing complex problems only to discover an empty fuel tank or disconnected battery cable.
Here’s your systematic approach to checking these three fundamentals:
Check the fuel level and quality. Open your generator’s fuel compartment and verify you actually have fuel. Sounds obvious, but gauge failures happen. If the tank sat all winter, old fuel might smell like varnish or look cloudy. Drain any suspect fuel and refill with fresh gas. For propane systems, confirm the tank valve is fully open and you have adequate pressure (you should hear a slight hiss when disconnecting the line).
Verify oil level and condition. Locate the oil dipstick (usually on the side of the generator). Pull it out, wipe it clean, reinsert it fully, then pull it out again to get an accurate reading. The oil should be between the min and max marks. If it’s black and gritty, you need an oil change. Many generators have low-oil shutoff sensors that prevent starting when levels drop, even slightly below the full mark.
Test the battery. Check that battery cables are tight at both ends. Wiggle them, if they move, tighten them down. Using a multimeter set to DC voltage, touch the red probe to the positive terminal and black to negative. A healthy 12-volt battery should read 12.4 to 12.7 volts when not charging. Anything below 12 volts means your battery can’t reliably turn over the starter.
Prime the fuel system if you ran dry. If your generator sputtered out from fuel starvation, air entered the fuel lines. Turn the fuel valve on, then press the primer bulb (if equipped) 15 to 20 times until it feels firm. For generators without a bulb, try starting in short three-second bursts with thirty-second rests between attempts. This pulls fuel through and purges air bubbles.
After running through this checklist, try starting your generator again. If it fires up, you’ve just saved yourself a service call. If not, you’ve eliminated three major variables and can move on to air filters and spark plugs with confidence that fuel, oil, and battery aren’t your problem.
Air and Spark: Filter and Plug Inspection
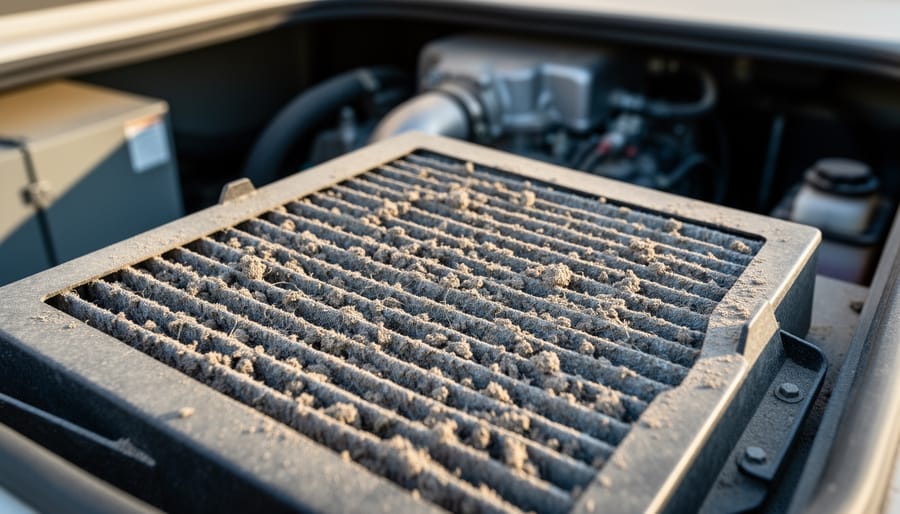
A close-up of a clogged air filter highlights how restricted airflow can prevent an RV generator from running properly.
A clogged air filter or fouled spark plug will stop your generator cold, and these are two of the easiest fixes you can do yourself. Both components are particularly vulnerable in RVs because generators sit idle for weeks or months between trips, giving dust, debris, and fuel residue plenty of time to create problems.
Locating and Inspecting Your Air Filter
Your generator’s air filter is typically housed in a foam or paper cartridge accessible from the exterior side panel. On most Onan and Cummins units, you’ll find it behind a small removable cover secured with two or three screws or clips. Pull out the filter element and hold it up to a light source, if you can’t see light passing through clearly, it needs attention.
For foam filters, wash them in warm soapy water, squeeze out the excess without twisting, and let them air dry completely before reinstalling. Paper filters can’t be washed; tap them gently against a hard surface to dislodge loose dirt, but replace them if they’re visibly caked or discolored. Generators that sit unused collect more dust than those run regularly, so inspect before every camping season regardless of hours logged.
Warning: Disconnect the spark plug wire and ensure the generator is completely cool before removing the spark plug or working near the fuel system to prevent accidental starts or burns.
Checking and Cleaning Spark Plugs
Locate the spark plug, usually near the engine’s cylinder head, and use a spark plug socket (typically 5/8″ or 13/16″) to remove it by turning counterclockwise. Examine the electrode end: a healthy plug shows a light tan or gray color. Black, sooty deposits indicate rich fuel mixture or incomplete combustion from infrequent use. White, blistered electrodes suggest overheating or wrong plug type.
Clean minor carbon buildup with a wire brush or spark plug cleaner tool, then check the gap with a feeler gauge (your manual specifies the correct gap, usually 0.028″ to 0.030″). If the electrode is worn rounded instead of square, or the insulator is cracked, replace the plug, they’re inexpensive insurance. When you reinstall, hand-tighten first, then snug with the socket wrench without overtorquing.
Generators that hibernate between seasons benefit from a light spray of fogging oil into the combustion chamber through the spark plug hole before storage. This prevents internal corrosion and makes spring startups easier.
When It Runs But Won’t Produce Power
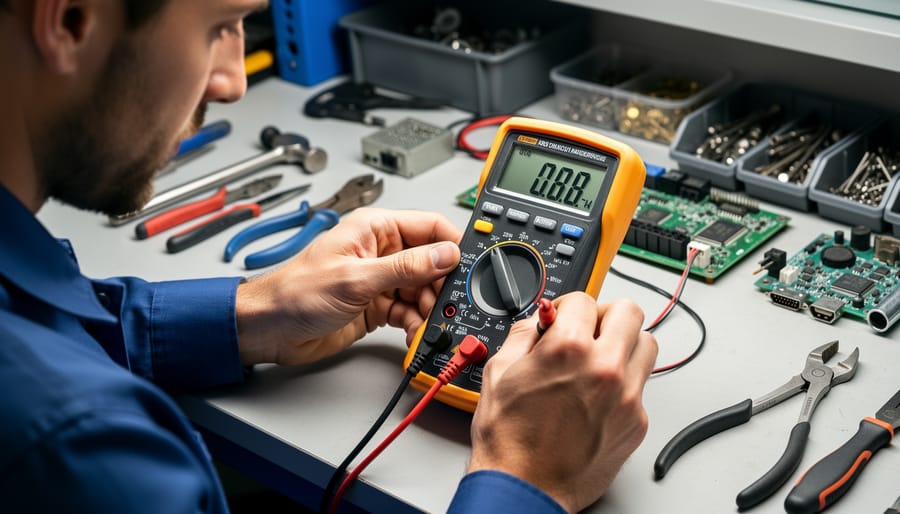
Testing for output issues with a multimeter helps you move from guessing to measurable troubleshooting.
A generator that starts and runs smoothly but delivers zero power to your outlets is one of the most frustrating scenarios, everything sounds normal, yet nothing works. The good news is that this problem usually traces back to a handful of electrical safety devices doing their job, and you can check them yourself.
Circuit Breakers and Reset Buttons
Start at the generator’s main circuit breaker panel. Look for any breakers in the tripped position (usually sitting between “on” and “off” or showing a red indicator). Reset them by pushing fully to “off” first, then back to “on”. Next, locate the overload reset button, often a red or black button on the generator’s control panel. Press it firmly; you should hear or feel a click. Many generators won’t produce power after an overload event until this reset is manually pressed, even if the engine restarts fine.
Voltage
The electrical pressure that pushes power through your RV’s wiring, measured in volts (120V for most RV outlets).
Amperage
The amount of electrical current flowing through a circuit, measured in amps; exceeding your generator’s amp rating trips breakers.
Circuit Breaker
An automatic switch that cuts power when it detects too much current, preventing wire damage and fires.
GFCI
Ground Fault Circuit Interrupter; a safety device that shuts off power instantly if it detects electrical leakage to ground, common in RV outdoor outlets.
Testing Your Outlets
Plug a simple lamp or phone charger into different outlets to see if any work. If some outlets have power but others don’t, you’re dealing with individual circuit issues, not generator failure. Check GFCI outlets (those with test/reset buttons) throughout your RV and press their reset buttons.
Using a Multimeter
Set your multimeter to AC voltage and test directly at the generator’s output receptacles. You should read around 120V (or 240V if testing the larger outlet). No reading means the problem is in the generator itself, likely a failed capacitor, stuck voltage regulator, or bad brushes. Readings below 100V suggest the generator needs professional attention. Before testing, make sure you ground your generator properly for safety.
If you’re consistently tripping breakers even after resets, you may be overloading the unit. Double-check your AC generator size matches your total running wattage, air conditioners, especially, demand substantial power at startup.
Advanced Diagnostics: When Simple Fixes Don’t Work
Sometimes the problem runs deeper than dirty plugs or low oil. If you’ve worked through the basics and your RV generator still refuses to cooperate, you’re likely dealing with electrical components that require more careful diagnosis. Here’s how to identify these issues and, more importantly, when to step back and call for help.
Testing for voltage regulator problems: Set your multimeter to AC voltage and check the generator’s output while it runs. You should see steady voltage around 120V (or 240V if that’s your system). If the reading swings wildly or sits far below target, the voltage regulator may be failing. This isn’t a weekend DIY fix for most people. The part costs $150-300, and incorrect installation can damage your entire electrical system.
Spotting capacitor failure: Capacitors help your generator start producing power, and when they fail, the unit runs but delivers no electricity. Look for bulging, leaking, or discolored capacitors near the generator head. Never touch a capacitor directly, they store dangerous electrical charges even when the generator is off. Discharge them properly with an insulated screwdriver across the terminals, or better yet, let a technician handle this repair.
Control board diagnostics: Modern generators rely on circuit boards that manage everything from startup to shutdown. If your generator shows erratic behavior, random shutdowns, flickering power, or nonsensical error codes, the control board might be the culprit. These boards aren’t field-repairable. Replacement costs $300-600 depending on your model, and the job requires disconnecting multiple wire harnesses in the correct sequence.
My honest advice? If you’ve reached this level of troubleshooting and don’t have electrical repair experience, calling a mobile RV technician saves you time, prevents expensive mistakes, and often costs less than buying diagnostic tools you’ll rarely use. These repairs typically run $400-800 including parts and labor, which beats the $1,500 risk of damaging your generator permanently.
Dealing With Error Codes
Modern RV generators flash error codes to save you from guesswork, but those blinking lights or LCD messages mean nothing if you can’t decode them. Most codes point to fixable issues, low oil pressure, overload trips, high temperature, while a few signal when it’s time to call for help.
Your generator’s manual holds the complete code list specific to your model. For Onan units, check the service door or battery compartment for a sticker with the manual’s part number, then download the PDF from Cummins’ website. Champion and Generac models typically include a quick-reference card tucked near the control panel. No manual? Search “[your generator model number] fault codes” to find owner forums where experienced RVers have compiled the common ones.
To reset a code after addressing its cause, turn the generator completely off using its main switch, wait 30 seconds, then restart. On Onan models, codes 13 (low oil), 14 (high temp), and 15 (overload) typically clear once you’ve fixed the trigger, topped off oil, allowed cooling time, or unplugged the overloading appliance. Code 33 (loss of RPM signal) or 36 (no AC output) often point to control board or sensor failures that need a technician’s multimeter and replacement parts.
If a code returns immediately after reset despite your fix, or if you see codes in the 30s range on Onan units, you’re likely facing electrical component failure rather than a maintenance oversight. That’s your cue to photograph the display, note exactly what the generator was doing when it failed, and contact a certified service center with your model and serial number ready.
Preventing Future RV Generator Problems
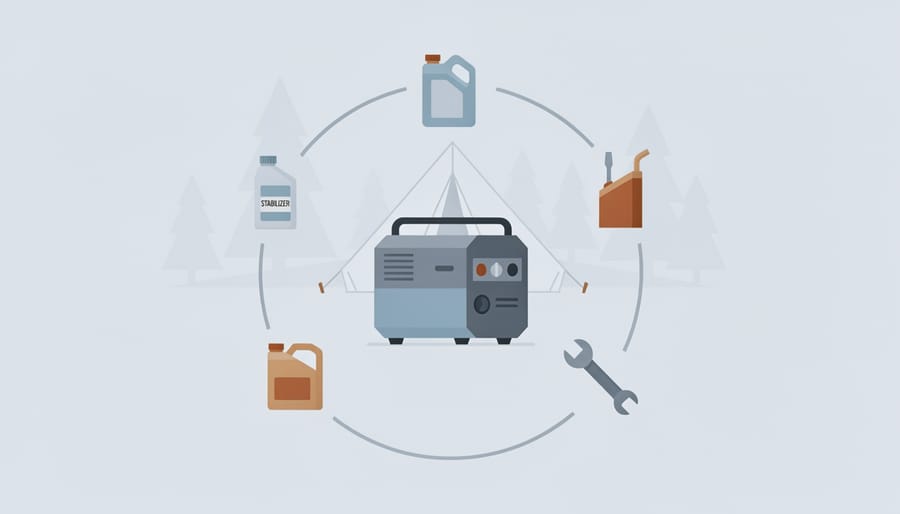
Maintenance supplies like stabilizer, oil, and clean tools symbolize prevention, helping avoid common generator failures before camping season.
The best generator repair is the one you never have to make. After fixing my own RV generator twice in one summer, I learned that spending thirty minutes every few months on maintenance beats spending hours troubleshooting in a campground with no cell service.
Run Your Generator Monthly
Your generator needs exercise even when you’re not using your RV. Start it once a month and let it run under load for at least two hours. This keeps internal components lubricated, prevents fuel system varnish buildup, and charges capacitors that can fail from disuse. Don’t just let it idle, plug in an appliance or run your AC to put actual demand on the system. Generators that sit for months between uses are far more likely to fail when you need them.
Fuel Stabilizer Is Non-Negotiable
Old fuel is behind more generator failures than any other single cause. Add fuel stabilizer every time you fill your tank, and use the higher concentration recommended for long-term storage if your RV will sit for more than a month. Ethanol-blended fuel degrades quickly and attracts moisture, gumming up carburetors and fuel lines. I keep a bottle of stabilizer in my RV permanently, it’s cheaper than a carburetor rebuild.
Follow a Regular Maintenance Schedule
Oil changes aren’t optional. Most RV generators need fresh oil every 100 hours of operation or annually, whichever comes first. Check your oil level before every trip. Replace air filters at least yearly, more often if you camp in dusty conditions. Spark plugs typically last 200-300 hours but should be inspected annually. Keep a simple log in your RV of when you last performed each maintenance task.
Seasonal Maintenance Checklist
Spring: Change oil, replace air filter, inspect spark plugs, test run under load
Fall: Add fuel stabilizer, run generator to circulate treated fuel through system
Winter: Full winterization including oil change, drain carburetor if storing in freezing temps, disconnect battery or use tender
Pre-Trip Inspection Routine
Before every outing, spend five minutes checking oil level, inspecting for loose connections or damaged wires, verifying the fuel shutoff valve is open, and running a quick test cycle. Catch problems in your driveway, not at the campsite.
For Solar-Hybrid Systems
If you’ve integrated solar panels with your generator setup, program your system to automatically exercise the generator monthly even when solar is meeting your needs. This prevents the “backup that fails when you need it” scenario. Monitor both systems together, solar reduces generator runtime, which means oil stays cleaner longer, but that same reduced use makes regular exercise runs even more critical for reliability.
Essential Tools and Supplies for RV Generator Maintenance
Having the right tools on hand turns a potential roadshow nightmare into a quick roadside fix. I learned this the hard way during a trip to Yosemite when my generator quit at dusk, turns out a $4 spark plug and ten minutes would have saved me from a cold, dark evening if I’d packed the right wrench.
Tool or Supply
What It’s For
Approximate Cost (2026)
Digital Multimeter
Testing battery voltage, AC output, and circuit continuity
$20, $50
Spark Plug Wrench (Deep Socket)
Removing and installing spark plugs in tight generator compartments
$8, $15
Replacement Air Filter
Quick swap when filter is clogged or damaged
$12, $30
Generator Oil (SAE 10W-30 or 15W-40)
Topping off or performing oil changes in the field
$8, $20 per quart
Fuel Stabilizer
Preventing fuel degradation during storage between trips
$10, $18 per bottle
Spare Spark Plug (Correct Type)
Immediate replacement if plug is fouled or damaged
$4, $12 each
Keep these items in a dedicated toolbox inside your RV, not in external storage bays where humidity can damage electronics. A basic socket set rounds out your kit for removing access panels and checking connections. If you’re also running solar panels, the multimeter pulls double duty for diagnosing both systems. Check our quiet generator tips for advice on balancing backup power with renewable energy. Before each trip, verify you have fresh oil and that your air filter hasn’t degraded in storage, five minutes of prep prevents hours of frustration.
Frequently Asked Questions
How often should I run my RV generator if I’m not using it regularly?
Run your generator under load for at least 30 minutes once a month, even during off-season storage. This prevents fuel system gumming, keeps seals lubricated, and ensures the generator will start when you need it for your next trip.
Can I use regular automotive oil in my RV generator?
Most RV generators require the same oil as small engines, typically SAE 10W-30 or 15W-40, but check your manual for the manufacturer’s specific recommendation. Automotive oil works fine, but avoid synthetic blends in older generators unless specified, and always match the viscosity to your operating temperature range.
Why does my generator work perfectly at home but struggle at high altitude?
Generators lose about 3-4% of their power output for every 1,000 feet above sea level due to thinner air affecting combustion. If you regularly camp above 5,000 feet, you may need to adjust the carburetor’s air-fuel mixture or consider a generator with altitude compensation features.
How long should an RV generator last with proper maintenance?
A well-maintained RV generator typically lasts 10,000 to 20,000 hours of runtime, which translates to 15-25 years for most recreational users. Proper oil changes, regular exercise, and clean fuel are the biggest factors in reaching the upper end of that range.
When should I replace my generator instead of repairing it?
Consider replacement if repair costs exceed 50% of a new unit’s price, if the generator is over 15 years old with major component failures, or if parts are no longer available. Also factor in whether a solar vs gas setup might better suit your current camping style and power needs.
What’s the number one mistake RV owners make with generator maintenance?
Letting the generator sit for months with untreated fuel in the tank. Old gas turns into varnish that clogs jets and gums up the carburetor, causing 80% of won’t-start problems. Always add fuel stabilizer before storage and run it through the system.
Is it normal for my generator to hunt or surge when running?
No, hunting (RPM fluctuations) usually indicates a dirty carburetor, stale fuel, or a vacuum leak in the fuel system. Clean the carb, replace the fuel, and check all fuel lines for cracks, this problem rarely fixes itself and will worsen over time.
These questions come up constantly in RV forums and campground conversations, and I’ve fielded most of them myself over the years. The altitude question especially catches people off guard, I once helped a couple at a Colorado campground whose generator kept shutting down, and they were convinced it was broken until we explained the elevation factor. They adjusted their expectations and ran fewer high-draw appliances, which solved the problem without any actual repair.
One thing worth adding: if you find yourself constantly troubleshooting your generator or it’s becoming unreliable despite your best maintenance efforts, take that as a signal. Modern RVing has changed, and many folks discover they can meet most of their power needs through upgraded battery banks and solar panels, using the generator only as true backup. That shift can actually reduce your maintenance headaches while giving you quieter, cleaner power for everyday camping.
You’ve just armed yourself with the knowledge to handle the most common RV generator issues without burning through hundreds of dollars on emergency service calls. Every time you diagnose a fuel problem, clean a spark plug, or reset an overloaded circuit yourself, you’re not just fixing a machine, you’re building the kind of self-reliance that makes RV life truly rewarding.
The money you save on professional repairs adds up fast. A typical service call starts at $150 before the technician even opens their toolbox, while most of the fixes we’ve covered cost under $20 in parts and an hour of your time. That’s real savings you can put toward your next adventure.
For those looking to reduce generator runtime altogether, pairing your backup power with renewable energy creates a remarkably resilient off-grid setup. Understanding the trade-offs between solar panels vs generators helps you build a system that meets your actual power needs without unnecessary fuel consumption. Our solar calculator tools can show you exactly how much panel capacity you’d need to minimize generator use while keeping your batteries topped up.
I still remember the satisfaction of getting my generator running again on that first camping trip, headlamp strapped on, troubleshooting my way through the problem while my family roasted marshmallows by flashlight. That moment taught me something valuable: you’re more capable than you think, and most problems have simpler solutions than they first appear. Keep this guide bookmarked, maintain your generator regularly, and enjoy the confidence that comes from knowing you can handle whatever your RV throws at you.
How useful was this post?
Click on a star to rate it!
Average rating 0 / 5. Vote count: 0
No votes so far! Be the first to rate this post.
We are sorry that this post was not useful for you!
Let us improve this post!
Tell us how we can improve this post?
charlesnoble
Here at Spheral Solar, I’m a hands-on solar power enthusiast, constantly exploring and experimenting with DIY solutions. I’m dedicated to sharing my discoveries, insights, and even the bumps I hit along the way, all in the pursuit of a more sustainable future.
Your Kohler Generator Won’t Start? Here’s How I… by Charlesnoble November 12, 2025 **Check your fuel level and oil pressure first**—90% of Kohler generator failures trace back to these two simple issues. I learned this the hard way during a three-day power outage when my generator shut down unexpectedly, leaving my solar battery backup system without its safety net. **Listen to your generator’s…
How to Bypass the On/Off Switch on Generator by Charlesnoble July 12, 2023 With some basic knowledge and a few tools, it’s straightforward to bypass the on/off switch and get your generator running again. This article provides a comprehensive guide on diagnosing a faulty on/off switch, bypassing it temporarily, and replacing it for a long-term solution. Some may argue that a solar generator…
Solar vs Gas Generator by Charlesnoble July 26, 2023 When it comes to solar generator vs gas generator, multiple factors come into play in the face-off between these two types of generators. Solar-powered generators utilize the sun’s energy, offering an eco-friendly, low-maintenance solution with potentially lower long-term costs. In contrast, gas-powered generators deliver immediate, consistent power output regardless of…
DIY Solar Generator – Complete Guide With Diagrams by Paul July 17, 2021 Building a weatherproof DIY solar generator involves mounting and wiring a battery, charge controller, inverter, trickle charger, and fusing inside a weatherproof case. Then all the relevant input and output sockets are wired and mounted on the outside of the case where they are easily accessible. What Exactly Are Solar…
11 Best Solar Generators for Your 2026 Camping Trip by Adeyomola June 22, 2021 Heads up: some links here are affiliate links, and purchases through them support the site. As an Amazon Associate I earn from qualifying purchases. Before buying a solar generator for your next camping trip, you should estimate how much power you need to run your appliances. Consider features like output…
Build Your Own Home Solar Power System and Actually… by Charlesnoble February 26, 2026 Calculate your daily energy consumption by examining your electricity bills for the past year—most households use between 20-30 kilowatt-hours per day, which translates to a 5-7 kilowatt solar array for complete energy independence. This single number determines everything: how many panels you’ll mount, the inverter capacity you’ll need, and whether…
Subscribe for handpicked DIY projects, exclusive tips, and giveaways.
Nine times out of ten, an RV generator that won’t start has a stale fuel problem. If your generator hasn’t run in more than 30 days, degraded gasoline is likely gumming up the carburetor and preventing ignition. Before you panic or call for expensive roadside service, try this: turn on the generator’s fuel valve (if… Read more: RV Generator Troubleshooting: Common Problems and How to Fix Them
A 5kW solar system occupies between 250 and 350 square feet of roof or ground space and produces roughly 20 to 25 kilowatt-hours of electricity per day in most U.S. locations. That’s enough to power a typical three-bedroom home with moderate energy use, though your exact needs depend on your daily consumption patterns, climate zone,… Read more: How to Size a 5kW Solar System for Your Home or RV
Installing a home solar system yourself takes 2-4 weekends for an average 5kW setup, requires solid electrical knowledge and comfort working at heights, and can save you $5,000-$8,000 in labor costs if you tackle everything except the final utility interconnection. The process breaks down into five main phases: permitting and design, mounting the racking system,… Read more: Solar Power Installation Step by Step: Complete DIY Guide From Start to Finish