Your Solar Light Won’t Turn On? Here’s Why (And How to Fix It Tonight)
Updated:
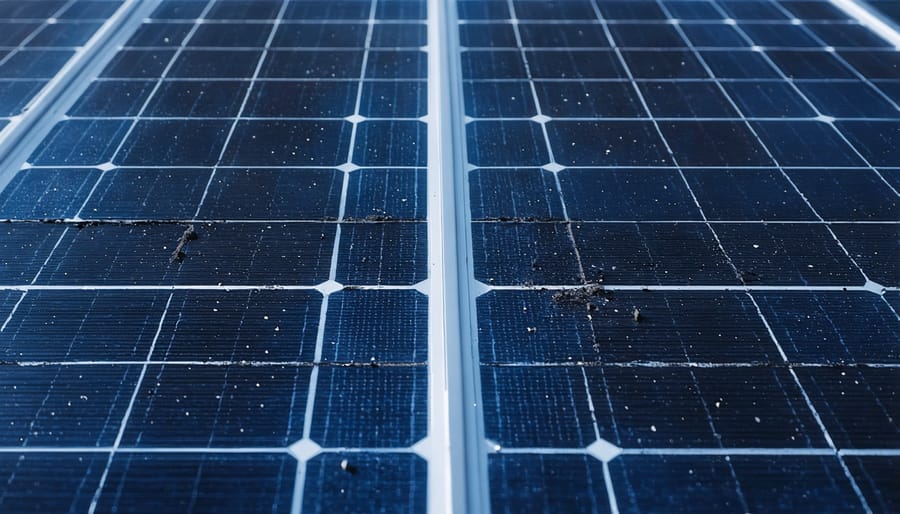
Check your solar panel first—nine times out of ten, dirt, leaves, or shade are blocking the sunlight your fixture needs to charge. I learned this the hard way when my entire pathway lighting system “died” last fall, only to discover a thin film of pollen had cut charging efficiency by 70%. Wipe the panel clean with a damp cloth and relocate any fixtures that receive less than 6-8 hours of direct sunlight daily.
Test the battery next by covering the solar panel completely after dark—if the light doesn’t turn on, you’ve found your culprit. Most solar lights use rechargeable AA or AAA batteries that degrade after 1-2 years of use. Pop open the battery compartment, check for corrosion (that white or green crusty stuff), clean the contacts with a pencil eraser, and try fresh rechargeable batteries before assuming the entire unit is toast.
Inspect the light sensor and switch position, as these get overlooked constantly. That tiny photo sensor—usually a small dome on top—can malfunction if covered in grime or spider webs. Clean it gently, then verify your light isn’t stuck in “off” mode via a hidden switch (yes, I’ve made this embarrassing mistake twice).
This guide walks you through each diagnostic step systematically, starting with the easiest five-minute fixes and progressing to more involved repairs. You’ll save money, reduce waste, and get those solar lights glowing again—usually within 15 minutes of focused troubleshooting.
The Most Common Culprit: Your Solar Panel Isn’t Charging
Dirt, dust, and debris accumulation on solar panels is the most common reason solar lights fail to charge and illuminate properly.
Quick Panel Health Check
Let me tell you about the time I spent an entire afternoon troubleshooting my pathway lights, only to discover they were covered in a thin film of pollen! It’s amazing how much a dirty panel can affect performance.
Start by giving your solar panel a good visual inspection. Look for any cracks, scratches, or cloudy discoloration on the surface. Even minor damage can significantly reduce how much sunlight the panel absorbs. Next, check if anything is blocking the panel—leaves, bird droppings, dust, or even cobwebs can create shade that prevents proper charging.
Now for the cleaning part. Gently wipe the panel surface with a soft, damp cloth. Avoid harsh chemicals or abrasive materials that could scratch the protective coating. For stubborn grime, a drop of mild dish soap works wonders. If you need more detailed guidance, our comprehensive guide on cleaning solar panels walks you through the entire process.
Here’s a simple sunlight test: observe your light’s location throughout the day. Your panel needs at least 6-8 hours of direct sunlight to charge effectively. I use my phone’s compass app to check if my panels face south (in the Northern Hemisphere) for maximum sun exposure. If trees, buildings, or eaves cast shadows during peak sun hours (10 AM to 2 PM), you’ve found your culprit.
Try relocating your light to a sunnier spot and see if performance improves after a full day of charging. Sometimes the fix is really that simple!
The Shadow Detective Game
Shadows can be sneaky troublemakers. I learned this the hard way when my pathway lights stopped charging in October—they’d worked perfectly all summer! Turns out, as the sun’s angle changed with the seasons, my neighbor’s fence cast afternoon shadows right across the panels.
Here’s your detective work: observe your solar lights at different times throughout the day. Morning sun doesn’t count for much if your panels are shaded during peak charging hours (10 AM to 2 PM). Take photos at 10 AM, noon, and 2 PM to document what’s really happening.
Try the “shadow test”: on a sunny day, check every two hours to see if trees, buildings, or even your own roof are blocking direct sunlight. Those dappled shadows from tree branches? They’re worse than you think—solar panels need direct, unobstructed light to charge efficiently.
If you’ve identified shading issues, relocate your lights to sunnier spots. Sometimes moving a light just two feet makes all the difference. Consider seasonal changes too—what works in summer might fail in winter when the sun sits lower in the sky. Mark problem areas on a simple sketch of your yard to plan better placement year-round.
Dead or Dying Batteries: The Silent Killer
Battery corrosion and deterioration are silent killers that prevent solar lights from functioning even when panels charge properly.
Testing Your Battery (No Fancy Tools Required)
You don’t need expensive equipment to check if your battery is toast—just your eyes and maybe a basic multimeter if you have one lying around.
Start with a visual inspection. Pop open your solar light (usually just a twist or a couple of screws) and remove the battery. I remember the first time I did this with my pathway lights—three out of five had white crusty stuff all over the battery terminals. That’s corrosion, and it’s a dead giveaway something’s wrong. If you see any white or greenish buildup, leakage, or the battery looks swollen or misshapen, it’s time for a replacement.
For a quick functional test, try the swap method. If you have multiple solar lights, swap a battery from a working light into your non-working one. If the previously dead light springs to life, you’ve found your culprit.
Now, if you have a multimeter (they’re about $15 and incredibly handy), here’s the simple test: Set it to DC voltage, touch the red probe to the positive terminal and black to negative. A fully charged AA or AAA rechargeable battery should read between 1.2-1.4 volts. Anything below 1.0 volts means the battery’s likely exhausted. For 18650 or lithium batteries, you’re looking for around 3.7 volts.
Pro tip from experience: Even if the battery tests okay, if it’s over two years old, consider replacing it anyway. Rechargeable batteries lose capacity over time, and a fresh battery might be exactly what your light needs.
Choosing and Installing Replacement Batteries
Finding the right replacement battery doesn’t have to be complicated! First, check your solar light’s battery compartment for the existing battery type—it’ll usually be stamped right on the battery itself. Most solar lights use either NiCd (Nickel-Cadmium) or NiMH (Nickel-Metal Hydride) rechargeable batteries. If you’re unsure which is better for your situation, our guide on NiCd vs NiMH batteries breaks down the pros and cons of each.
I learned this the hard way when I grabbed the wrong batteries at my local hardware store—my lights worked for about two days before dying completely! Make sure you match both the battery type AND size (typically AA or AAA).
**Where to Buy:** Your local hardware store, home improvement centers, or online retailers like Amazon all carry solar light batteries. I’ve found the best deals buying in multi-packs online, usually around $10-15 for a set of four.
**Safe Installation Steps:**
1. Turn off your solar light and remove it from its stake or mount
2. Open the battery compartment (usually requires a small screwdriver)
3. Note which direction the old battery faces—snap a quick photo with your phone!
4. Remove the old battery and clean any corrosion with a dry cloth
5. Insert the new battery matching the positive (+) and negative (-) symbols
6. Close the compartment securely
7. Place the light in direct sunlight for a full day before testing
The On/Off Switch Mystery
Before you dive into complex troubleshooting, let’s start with the most embarrassingly simple fix—one that catches even experienced DIYers off guard. I learned this lesson when my neighbor Charles called me over, frustrated that his brand-new solar path lights weren’t working. After checking the panels and batteries, I noticed a tiny switch tucked underneath the fixture. One flip later, and they blazed to life. We both had a good laugh.
Many solar lights come equipped with on/off switches positioned in inconspicuous spots—underneath the light head, inside the battery compartment, or along the stake. These switches prevent battery drain during shipping and storage, but they’re easy to overlook during installation.
Even trickier are the plastic pull-tabs inserted between the battery contacts. These thin protectors stop the circuit from completing until you’re ready to use the light. If you skipped the instructions (no judgment—we’ve all been there), you might have missed removing them entirely.
**Quick check**: Flip your solar light over and inspect every surface for small switches or tabs. Look inside the battery compartment too. This thirty-second inspection could save you hours of unnecessary troubleshooting and immediately get your lights working again.
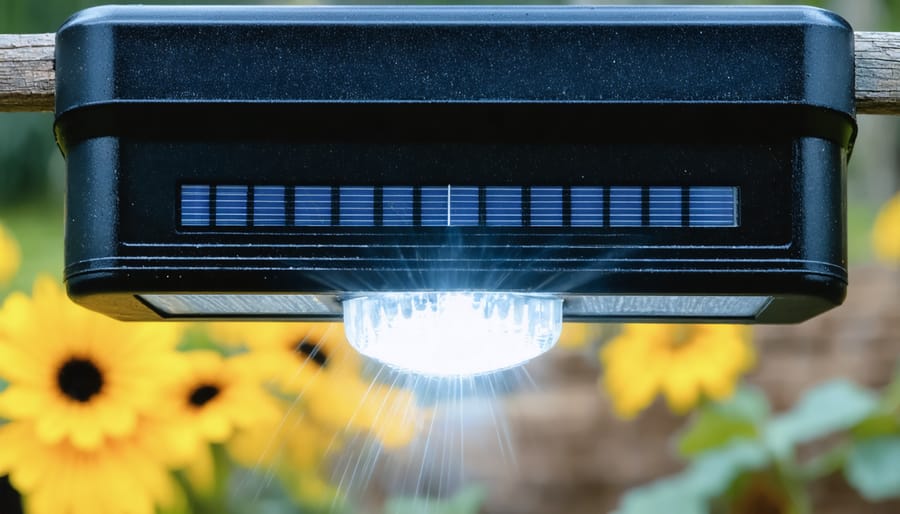
Sensor Problems: When Your Light Can’t Tell Day from Night
Testing Your Light Sensor
The light sensor is your solar light’s “brain” that tells it when to turn on and off. When this gets dirty or malfunctions, you might notice your lights staying on during day or not turning on at all.
Here’s a simple test I learned after my patio lights stopped working last summer: Wait until dusk when the light should activate, then fully cover the sensor with your hand or dark tape. The light should turn on within 10-30 seconds. If it does, your sensor works fine! If nothing happens, you’ve found your culprit.
Before replacing the sensor, try this quick fix: Clean the sensor window thoroughly with a soft cloth and rubbing alcohol. Dirt, pollen, and grime build up over time, creating a film that confuses the sensor. I’ve seen lights “come back to life” after a good cleaning more times than I can count.
The sensor is usually a small circular or rectangular component on top of the light. Look for a translucent covering—that’s your target. After cleaning, repeat the coverage test to confirm it’s working properly.
When Nearby Lights Confuse Your Sensor
I learned this lesson the hard way when I installed solar path lights along my driveway, only to find them stubbornly dark every evening. After checking everything else, I finally noticed my neighbor’s bright security light was flooding my yard—my solar sensors thought it was still daytime!
Solar lights use a photocell sensor that detects darkness before switching on. When nearby porch lights, street lamps, or even bright moonlight hit that sensor, your light thinks the sun’s still up and won’t activate. It’s frustrating, but totally fixable.
**Try these solutions:**
First, relocate your light to a shadier spot where ambient light won’t reach the sensor directly. Even moving it a few feet can make a difference.
If relocation isn’t possible, create a small shield using black electrical tape or a cardboard collar around the sensor. Just be careful not to block it completely—you want to block side light while still allowing it to detect overhead darkness.
You can also adjust the angle of your light so the sensor faces away from bright sources. Test it after sunset by covering the sensor with your hand—if the light turns on, you’ve solved the problem!
Water Damage and Weatherproofing Failures
Water is solar lighting’s silent enemy. I learned this the hard way when three of my pathway lights stopped working after a heavy rainstorm. At first, I thought the batteries had died, but when I opened them up, I found tiny droplets of moisture clinging to the circuit board—a clear sign that water had found its way inside.
Moisture intrusion happens when the weatherproof seals around your solar light degrade over time. UV exposure, temperature fluctuations, and age all cause rubber gaskets and silicone seals to crack and shrink. Once compromised, water seeps into the electronics, causing corrosion, short circuits, and complete failure.
**Signs of water damage include:**
– Condensation visible inside the light cover
– Corroded battery terminals with white or green buildup
– Rust spots on metal components
– Circuit boards with dark staining or mineral deposits
– Intermittent operation that worsens in humid weather
To check your seals, remove the light’s cover and inspect the rubber gasket carefully. Look for cracks, brittleness, or sections that feel hard rather than flexible. The seal should compress slightly when you press it—if it doesn’t, it’s time for replacement.
For quick repairs, clean the sealing surfaces with rubbing alcohol and apply a thin bead of clear silicone sealant around the gasket edge. Let it cure for 24 hours before reassembling. You can also try weatherproofing with nail polish for small cracks and gaps—it’s surprisingly effective!
Prevention is easier than repair. Every six months, inspect your lights’ seals and reapply silicone to vulnerable areas before problems develop. This simple maintenance step can extend your solar lights’ lifespan by years.
Moisture intrusion through failed weatherproofing seals causes internal damage and prevents solar lights from operating correctly.
LED Bulb Burnout (Rare But It Happens)
Here’s the honest truth: LED bulbs are absolute workhorses. I’ve had solar lights running continuously for five years without the LED giving out. But just like that one reliable friend who finally cancels plans, LEDs can fail—it’s rare, but it happens.
The tricky part? LED failure looks suspiciously like battery or solar panel problems. Here’s how to tell the difference: If you’ve already tested your battery (pop it in a flashlight or swap it with a known good one) and confirmed your solar panel is charging properly, but your light still won’t illuminate, you’re likely dealing with LED burnout.
Another telltale sign is flickering before complete failure. I once had a pathway light that started doing this strange strobe effect—definitely the LED saying its final goodbye.
Now, here’s where you need to make a practical decision. Replacing an LED requires some soldering skills and sourcing the right component. For a $10 solar light? Honestly, just grab a new one. But for those beautiful $40+ decorative fixtures or high-quality landscape lights? Replacement absolutely makes sense.
You can find replacement LED bulbs online for $3-8, and many newer solar lights have plug-and-play LED modules that require zero soldering. Check your manufacturer’s website first—some offer replacement parts directly.
**Quick LED Test**: Connect your charged battery directly to the LED terminals with small wires. No light? That’s your culprit. This simple test saves you from replacing parts unnecessarily.
Brand New Solar Lights That Don’t Work
I remember the excitement of installing my first set of solar path lights, only to find them completely dark that evening. Before you spiral into troubleshooting mode, let’s check a few things that catch even experienced DIYers off guard.
First, flip over your new solar light and look for a small plastic tab or pull-strip near the battery compartment. Manufacturers often insert these protective tabs to prevent battery drain during shipping and storage. I’ve sheepishly discovered this simple fix more times than I’d like to admit! Simply remove the tab, and your light should start working immediately.
Even without a protective tab, brand new solar lights need an initial charge before they’ll work properly. Place them in direct sunlight for at least 8-12 hours—yes, a full sunny day—before expecting them to illuminate. The batteries arrive partially charged at best, and testing them indoors under artificial light won’t cut it for that crucial first charge.
If you’ve removed any tabs and given your lights a full day of sunshine but they’re still not working, you’re likely dealing with a manufacturing defect. Check if the solar panel looks damaged, the battery compartment seals properly, or any wires appear disconnected. Most retailers offer hassle-free returns within 30-90 days.
Here’s my rule: if a brand new light doesn’t work after proper initial charging, return it rather than troubleshoot it. Save your DIY energy for lights that have actually worked before—that’s where your skills really shine!
Charles’s Quick Troubleshooting Checklist
I’ve created this handy checklist after years of troubleshooting solar lights in my own yard—and trust me, I’ve made every mistake in the book so you don’t have to! Print this out or save it on your phone for quick reference when your lights aren’t cooperating.
**Start Here (30 seconds each):**
☐ Check the ON/OFF switch—yes, I once spent 20 minutes troubleshooting before realizing mine was off!
☐ Look for physical damage: cracks, water inside, or broken parts
☐ Verify the light is getting direct sunlight (not under a tree or awning)
**Quick Cleaning (5 minutes):**
☐ Wipe the solar panel with a damp cloth—dirt blocks up to 50% of charging power
☐ Clean the light cover or bulb area
**Battery Check (10 minutes):**
☐ Turn on the light in complete darkness—does it work even briefly?
☐ Check battery connections for corrosion (white or green buildup)
☐ Remove battery and look for bulging or leaking
☐ Test battery voltage with a multimeter if available (should read 1.2V for NiMH)
**If Still Not Working:**
☐ Leave light off for 2-3 sunny days for a full recharge attempt
☐ Try a fresh rechargeable battery of the same type
☐ Inspect the sensor—cover it completely and see if light turns on
☐ Examine wiring connections inside the unit
☐ Test in a completely dark room or closet (sometimes they work but your area isn’t dark enough)
**Pro tip:** Work through this list in order—I’ve found that 80% of problems are solved in the first two sections. Don’t jump ahead to complex solutions when it might just need a good cleaning!
Here’s the truth I’ve learned from years of tinkering with solar projects: most solar light problems aren’t death sentences. Nine times out of ten, you’re looking at a simple fix—a dirty panel, a repositioned light, or a quick battery swap. I remember feeling completely defeated when my first solar path lights failed after just two months, but after cleaning the panels and replacing those cheap batteries, they worked beautifully for years afterward.
You’ve got this. The troubleshooting steps we’ve covered aren’t rocket science—they’re practical fixes that anyone can tackle with basic tools and a bit of patience. And honestly? There’s something deeply satisfying about bringing a “dead” solar light back to life instead of tossing it in the trash.
I’d love to hear your solar light success stories! What creative solutions have you discovered? Did you find a fix we didn’t cover? Share your experiences in the comments below—your insights might be exactly what another DIYer needs to hear.
Ready to take your solar journey further? Check out our solar calculator tools to plan your next DIY solar project, whether it’s landscape lighting, security lights, or something more ambitious. The community is here to support you every step of the way.
How useful was this post?
Click on a star to rate it!
Average rating 0 / 5. Vote count: 0
No votes so far! Be the first to rate this post.
We are sorry that this post was not useful for you!
Let us improve this post!
Tell us how we can improve this post?
charlesnoble
Here at Spheral Solar, I’m a hands-on solar power enthusiast, constantly exploring and experimenting with DIY solutions. I’m dedicated to sharing my discoveries, insights, and even the bumps I hit along the way, all in the pursuit of a more sustainable future.
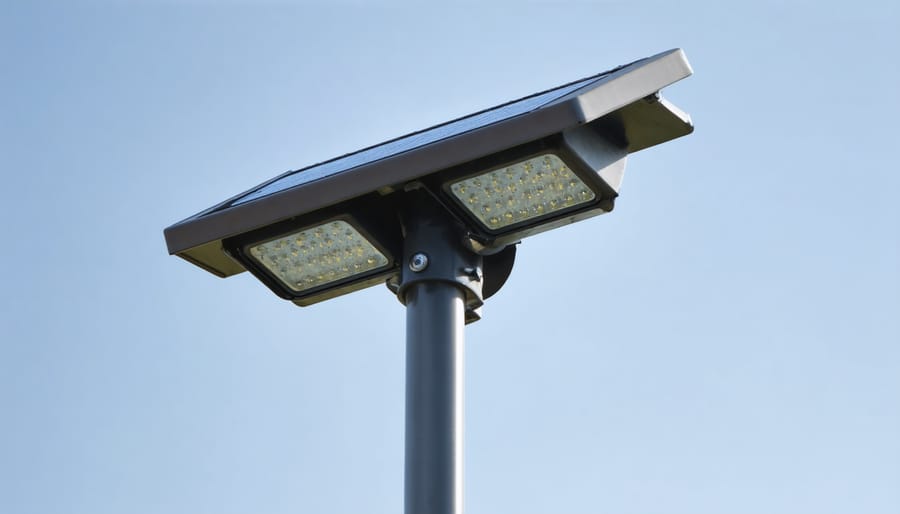
Why Your Solar Area Lights Keep Failing (And How to… by Charlesnoble April 21, 2026 Mount your solar area lights where they’ll receive at least 6-8 hours of direct sunlight daily, avoiding shade from trees, buildings, or eaves that can cut charging efficiency by 70% or more. I learned this the hard way when my driveway lights barely lasted two hours each night until I…
Your Hampton Bay Solar Light Stopped Working? Here’s… by Charlesnoble November 2, 2025 **Check the solar panel surface first** – dirt, leaves, or a thin film of grime blocks sunlight absorption and prevents charging. I learned this the hard way when my own Hampton Bay pathway lights died after just two weeks; a simple wipe with a damp cloth brought them back to…
Why Your Solar Lights Glow Yellow (And How to Fix Them) by Charlesnoble December 30, 2025 Notice your once-bright solar lights glowing yellow or dim? This frustrating problem typically signals one of three culprits: aging batteries that can’t hold a full charge, dirty solar panels blocking sunlight absorption, or LEDs nearing the end of their lifespan. I’ve dealt with this issue countless times in my own…
Why Your Solar Lights Stopped Working After Rain… by Charlesnoble May 21, 2026 Check the solar panel surface first—wipe away any water droplets, dirt, or debris that accumulated during the rain, as even a thin film can block up to 25% of light absorption. I learned this the hard way last spring when my pathway lights stayed dark for three days straight, and…
Why Your Solar Lights Stop Working (And How to Fix… by Charlesnoble December 1, 2025 Check the solar panel first by wiping away dirt, leaves, and debris that block sunlight absorption. A grimy panel is the number one reason solar lights stop working, and a simple cleaning with soapy water restores function in about 60% of cases. While you’re at it, reposition any lights that…
10 Best Outdoor Solar Lights in 2023 by Adeyomola August 30, 2021 You will get the best experience with outdoor solar lights when you opt for lights with good solar panels and long lighting times. But besides that, ensure your choice can charge quickly and offers sufficient brightness. Such a selection will give you a complete experience. Best Solar Lights for Outdoors…
Subscribe for handpicked DIY projects, exclusive tips, and giveaways.
Monitor your greenhouse temperature daily during peak sun hours—if it consistently exceeds 85°F or condensation builds up on interior surfaces, you’re losing crops to heat stress and creating the perfect environment for fungal diseases. A greenhouse solar ventilation fan addresses both problems without adding a penny to your electricity bill, making it one of the… Read more: Why Your Greenhouse Needs a Solar Ventilation Fan (Before Summer Hits)
Press and hold the adjust button (usually bottom-left) on your G-Shock for three seconds until the time display starts flashing—this unlocks manual time adjustment on most models. Navigate between hours, minutes, and date using the mode button, then use the forward/reverse buttons to change values. If you own a radio-controlled G-Shock with Multi-Band 6 technology,… Read more: How to Adjust Time on Your G-Shock Solar Watch (Without Breaking It)
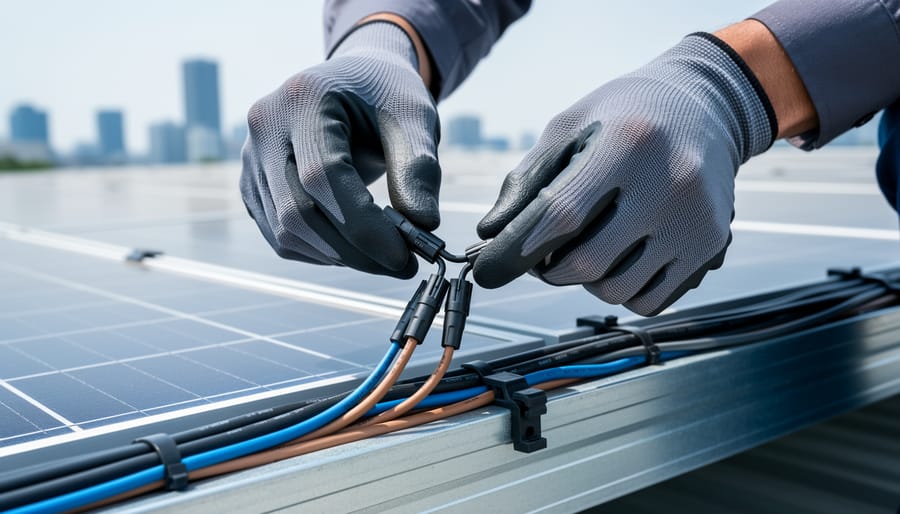
Picture this: you’ve just installed your third solar panel on the roof, wires dangling everywhere, and suddenly you realize your two-panel string needs to connect with your new addition. You need a solar branch connector, but you’re staring at product listings wondering if you’re about to make an expensive mistake. Solar branch connectors are the… Read more: Why Your Solar Array Needs Branch Connectors (And How to Install Them Right)

")
")
")
")
")

")
")
")
")
")