Turn Any Chandelier Into a Solar-Powered Showpiece (No Electrician Needed)
Updated:
Gather mason jars, solar garden lights, and a wire basket to create an elegant outdoor chandelier that requires zero electrical wiring and costs under $50. Pop the solar panels off inexpensive garden stakes, fit them into jar lids you’ve drilled holes through, and suspend everything from a chandelier frame you’ll make from the basket or a thrift store find.
I stumbled onto this project three summers ago when my back patio desperately needed ambiance but had no outdoor outlets. What started as a frustration became my favorite weekend build. The beauty of solar chandeliers lies in their flexibility—hang them from tree branches, pergola beams, or shepherd’s hooks, and let the sun do all the work. During peak summer, mine glows for 6-8 hours straight after a full day’s charge.
The construction takes about two hours once you’ve assembled your materials. You’ll drill, wire, and weatherproof your components using basic tools most DIYers already own. The solar panels charge during daylight, store energy in small rechargeable batteries, and automatically illuminate your jars at dusk. No switches, no timers, no electricity bills.
This guide walks you through every decision point: selecting the right solar lights for maximum brightness, choosing between mason jars and alternative glass containers, creating stable hanging mechanisms that withstand wind, and troubleshooting common issues like insufficient charging or moisture buildup. Whether you’re lighting a dinner party or adding permanent backyard charm, you’ll have a functioning solar chandelier by Sunday evening.
Why Convert a Chandelier to Solar Power?
I’ll be honest with you—when I first converted a vintage chandelier to solar power for my patio, I didn’t expect it to become one of my favorite DIY projects ever. But the benefits were immediate and genuinely surprising.
The most obvious advantage is freedom from electrical wiring. No need to hire an electrician, trench underground cables, or worry about finding an outdoor outlet. You can hang your solar chandelier anywhere that gets decent sunlight—from a tree branch to a pergola to a shepherd’s hook in the middle of your garden. I moved mine three times in the first month just because I could, finally settling on the perfect spot over our outdoor dining table.
Portability is a game-changer for outdoor enthusiasts. Take your chandelier camping, to beach parties, or tailgating events. It’s become my signature contribution to our annual family reunion—everyone asks about “Charles’s fancy camping light.” The process of converting outdoor lights to solar opens up possibilities you never considered before.
Cost savings add up quickly too. After the initial investment in solar components—which typically runs between $20-50 depending on your fixture size—you’ll never pay another cent for electricity. Compare that to running conventional outdoor lighting for hours each evening, and the project pays for itself within a year or two.
Then there’s the creative satisfaction. Transforming a $5 thrift store chandelier into a functional, eco-friendly lighting feature feels genuinely rewarding. You’re keeping something beautiful out of the landfill while creating a unique conversation piece. Plus, you’ll gain practical skills with solar technology that transfer to countless other projects.
The environmental benefits speak for themselves—clean, renewable energy with zero carbon footprint. But honestly, most people stick with solar chandeliers simply because they’re practical, beautiful, and surprisingly easy to create once you understand the basics.
A converted solar chandelier transforms an ordinary backyard patio into an enchanting outdoor living space without any electrical wiring.
What You’ll Need for Your Solar Chandelier Conversion
Choosing Your Chandelier
The foundation of your solar chandelier starts with picking the right base fixture. I learned this the hard way when my first attempt used a heavy iron chandelier that nearly pulled down my pergola! Look for lightweight options made from plastic, resin, or thin metal that weigh under five pounds. Size matters too – aim for something between 12 to 18 inches in diameter, which provides enough space for solar components without overwhelming your outdoor space.
Thrift stores and yard sales are treasure troves for affordable chandelier bases. I found mine for eight dollars at a local estate sale, and after a quick spray paint refresh, it looked brand new. Online marketplaces and dollar stores also stock decorative hanging planters or candle holders that work beautifully as chandelier frames.
Consider how many arms or tiers your chandelier has, as this determines how many solar lights you’ll need. A simple three-arm design is perfect for beginners, while more elaborate pieces can accommodate six or more lights. Make sure any glass or crystal elements are securely attached – outdoor conditions can loosen components over time. The goal is finding something visually appealing that can handle light modification without falling apart during installation.
Solar Components You’ll Actually Need
Let me walk you through the essential components you’ll need for your solar chandelier—I promise it’s simpler than it sounds! When I built my first one three years ago, I overthought everything and ended up with components that didn’t match. Learn from my mistakes and get it right the first time.
Start with your solar panel. For a chandelier with 4-6 LED bulbs, a 10-20 watt panel works perfectly. I recommend going with 20 watts if you live somewhere with less consistent sunshine—it gives you a nice buffer. Understanding how solar lights work helps explain why panel size matters: bigger panels capture more energy during shorter daylight hours.
Your battery bank stores the power for nighttime use. A 12-volt system with 7-10 amp-hours of capacity will keep your chandelier glowing for 6-8 hours after sunset. Deep-cycle batteries work best here. Check out the best rechargeable batteries to find options that balance longevity with performance.
The charge controller is your system’s guardian angel—it prevents overcharging during sunny days and protects against battery drain at night. A simple 10-amp PWM controller costs around fifteen dollars and does the job beautifully for this application.
For LED bulbs, stick with 3-watt bulbs maximum. They provide plenty of ambiance without draining your battery too quickly. I use warm white 2700K bulbs—they create that cozy outdoor atmosphere everyone loves.
Finally, grab some 18-gauge wire for connections under three feet and 16-gauge for longer runs. Weather-resistant wire matters outdoors—trust me on this one!
All the essential components needed for a solar chandelier conversion laid out and ready for assembly.
Tools and Hardware
You won’t need a fully stocked workshop for this project – just a few basics you probably already have around the house. Here’s what I typically reach for: a drill with bits (or a hammer and nail for smaller holes), wire cutters or sturdy scissors, pliers for bending and shaping, and a screwdriver set. When I built my first solar chandelier, I actually used kitchen scissors for most of the wire work!
Don’t have a drill? A manual hand drill or even a heated nail works perfectly for making holes in plastic components. For measuring, a simple ruler or tape measure keeps everything proportional. If you’re working with metal frames, a basic hacksaw does the trick, though sturdy pruning shears can cut lighter gauge wire just fine.
Keep some sandpaper handy for smoothing rough edges, and grab a pencil for marking. That’s honestly it – the beauty of this project is its accessibility, not requiring specialized equipment.
Step-by-Step: Converting Your Chandelier to Solar
Step 1: Prep and Plan Your Layout
Before diving into your solar chandelier project, take some time to carefully assess what you’re working with. I learned this the hard way when I rushed into my first conversion and ended up with components that didn’t quite fit!
Start by examining your chandelier’s structure. Look for a sturdy frame that can support solar panels and batteries without sagging. If your chandelier has old electrical wiring, safety comes first. Turn off the power at the breaker, test with a voltage tester to confirm it’s dead, then carefully disconnect and remove all wiring. For outdoor use, you won’t need any of those old electrical components anyway.
Next, map out where everything will go. Lay your chandelier on a work surface and arrange your solar panel, battery pack, and LED lights before permanently attaching anything. This dry run saves headaches later. Consider the sun’s path too—you’ll want the solar panel positioned where it catches maximum daylight, typically on top of the chandelier or angled slightly upward.
Measure the spacing between arms or light holders to ensure your LED bulbs or string lights will fit comfortably. Take photos of your planned layout from multiple angles. Trust me, you’ll thank yourself later when you’re wondering which wire went where during reassembly.
Step 2: Install Your LED Bulbs
Now comes the fun part – bringing your chandelier to life with LED bulbs! First things first: you’ll need to convert your existing bulb sockets to work with low-voltage LEDs. Most traditional chandelier fixtures use standard E26 or E12 sockets designed for 120V bulbs, but our solar setup runs on 12V DC. You have two options here: replace the entire socket with low-voltage versions (available at most hardware stores), or simply use 12V LED bulbs that fit your existing sockets – these are increasingly common and make the conversion much easier.
Here’s a quick story: when I built my first solar chandelier, I mistakenly wired the bulbs in series, thinking it would be simpler. The result? Dim, flickering lights that barely illuminated my patio. That’s when I learned the golden rule – always wire LED bulbs in parallel. This means connecting all the positive wires together and all the negative wires together, ensuring each bulb receives the full voltage from your solar charge controller. Think of it like branches on a tree rather than links in a chain.
Common fitting issues? Check that your bulbs match your voltage requirements exactly. If bulbs flicker or won’t light up, verify your connections are secure and that you haven’t accidentally reversed polarity. Use wire nuts or terminal blocks to keep connections tight and weatherproof. Remember, patience here pays off – a properly wired system will give you years of beautiful, reliable light.
Installing low-voltage LED bulbs and connecting the charge controller are straightforward tasks that require only basic wiring skills.
Step 3: Wire Your Battery and Charge Controller
Now comes the exciting part where everything comes together! Don’t worry if you’ve never done any electrical work before. This is a low-voltage system, which means it’s much safer than household wiring. I remember my first solar project and being terrified of getting shocked, but at 12 volts, you won’t even feel a tingle.
Start by connecting your solar panel to the charge controller. Most controllers have clear markings: look for terminals labeled “solar” or showing a sun symbol. Connect the positive (usually red) wire from your panel to the positive terminal, and negative (black) to negative. Think of it like matching colors in a paint-by-numbers kit.
Next, attach your battery to the “battery” terminals on the controller using the same color-matching approach. Finally, connect your LED string lights to the “load” or “light” terminals. The charge controller acts as the brain of your system, preventing overcharging during the day and providing power at night.
For hiding components, I’ve found that waterproof junction boxes work beautifully. Mount the box on your chandelier’s support structure or tuck it behind decorative elements. The battery can sit in the same box or a separate one nearby. Keep everything accessible for maintenance, but out of direct rain.
Here’s your safety checklist: always connect components when they’re powered off, double-check your positive and negative connections before turning anything on, and use electrical tape or heat shrink tubing to cover any exposed wire connections. If something doesn’t fit easily, don’t force it.
Step 4: Connect Your Solar Panel
Now for the exciting part – giving your solar panel a home! I learned this lesson the hard way during my first chandelier attempt: placement makes or breaks your project. Let’s get this right from the start.
First, scout the perfect spot for your solar panel. You want maximum sun exposure, ideally facing south if you’re in the Northern Hemisphere. The panel should receive at least 6-8 hours of direct sunlight daily. I mounted mine on my shed roof, about 15 feet from where the chandelier hangs, and it works beautifully.
For mounting, you have several options. Metal L-brackets work great for wooden surfaces like fences or shed roofs. Just drill pilot holes first to prevent splitting. If you’re mounting to masonry, grab some concrete anchors. Many solar panels also come with adjustable mounting kits that let you angle them toward the sun – these are worth the extra few dollars.
Now, let’s talk about running those connections. Use weatherproof cable rated for outdoor use, typically 18-gauge wire works fine for small chandelier setups. Run the wire along existing structures when possible, securing it every 12-18 inches with outdoor-rated cable clips. If you need to bury any cable, use conduit to protect it from garden tools and curious critters.
Here’s a pro tip from my own experience: leave some slack in your connections. Temperature changes cause materials to expand and contract, and you don’t want tight wires pulling your connections apart during winter. Add waterproof wire connectors at junction points, and seal everything with heat-shrink tubing or silicone sealant for extra protection.
Step 5: Test and Weatherproof
Before you hang your solar chandelier, let’s make sure everything works perfectly. I learned this the hard way when I once skipped testing and had to climb back up a ladder twice in one afternoon!
Start by placing your chandelier in direct sunlight for a full day to charge the battery completely. Once evening arrives, check that all LED lights illuminate properly. If some bulbs are dim or flickering, review your wire connections and solder joints.
Now for weatherproofing, which is absolutely essential for outdoor durability. Apply silicone sealant around all connection points where wires enter the chandelier body. For the solar panel connections, use heat-shrink tubing over any exposed wiring, then add a layer of liquid electrical tape for extra protection. I also recommend coating the charge controller with a conformal coating spray if it will be exposed to moisture.
Give special attention to the battery compartment. If your design doesn’t have a sealed enclosure, create one using a small waterproof project box with a rubber gasket. Drill a small ventilation hole to prevent condensation buildup, but position it facing downward.
Finally, do a rain test by gently spraying water on your chandelier to identify any weak spots before installation.
Sizing Your Solar System (Quick Calculator Guide)
Getting the right solar panel and battery size doesn’t require a math degree, I promise! When I built my first solar chandelier, I overestimated wildly and ended up with a panel that could power a small refrigerator. Let’s make sure you get it just right.
Start by adding up your chandelier’s total power consumption. If you’re using five LED bulbs rated at 3 watts each, that’s 15 watts total. Next, think about how many hours you want it to shine each evening. Let’s say 5 hours. Multiply those numbers: 15 watts times 5 hours equals 75 watt-hours of energy needed per night.
Now here’s where it gets fun. Head over to Spheral Solar’s interactive calculator tool, which does the heavy lifting for you. Simply plug in your 75 watt-hours requirement, your location (for sunlight estimates), and it’ll recommend the ideal panel and battery combination. The calculator accounts for real-world factors like cloudy days and seasonal variations, which honestly saved me from a lot of trial and error.
For our example, the calculator typically suggests a 20-30 watt solar panel paired with a 12-volt battery rated around 10-15 amp-hours. This gives you enough buffer for those overcast stretches when your panel isn’t operating at peak efficiency.
Pro tip from experience: always size up slightly rather than cutting it close. That extra capacity means your chandelier keeps glowing even during unexpected weather patterns. Think of it as insurance for those summer evening gatherings you don’t want interrupted by darkness. The calculator makes this easy by showing you multiple options at different price points, so you can balance performance with your budget.
Charles’s Pro Tips and Lessons Learned
After building my third solar chandelier, I’ve learned what really matters and what’s just overthinking. Let me share the wisdom I gained through trial, error, and a few midnight trips to the hardware store.
My biggest rookie mistake? Skimping on wire gauge. I used thin craft wire on my first project because it looked prettier, and half my lights barely glowed. Turns out, wire thickness actually affects how well electricity flows to your LEDs. Now I always use at least 18-gauge wire for connections longer than a foot. It’s not sexy, but your chandelier will actually work.
Here’s a money-saving hack nobody tells you: skip the expensive solar light kits marketed for crafts. I buy basic solar pathway lights from discount stores at two dollars each, harvest their solar panels and batteries, then return the plastic stakes for store credit. I’ve built chandeliers for under fifteen dollars this way.
For mounting, forget complicated pulley systems unless you’re genuinely changing height frequently. My second chandelier had this elaborate adjustable setup that I used exactly once. A simple shepherd’s hook or sturdy tree branch with a S-hook works perfectly. Just make sure whatever you hang from can handle wet weight, which is heavier than you think.
The solar panel positioning obsession is real, but here’s the truth: as long as it gets four to five hours of direct sun, you’re golden. I wasted hours perfectly angling panels at some magical degree when a simple south-facing tilt worked just fine.
One creative solution I’m proud of: using clear fishing line instead of chain. It creates this floating effect at night where you only see the lights, not the chandelier structure. Magical and costs three dollars per spool.
Common mistake to avoid: overloading your solar capacity. Each small panel powers about six to eight LEDs comfortably. I tried cramming twenty lights on one panel once. They flickered pathetically like dying fireflies. Not the ambiance I wanted.
Beyond the Basics: Creative Variations
Once you’ve mastered the basic solar chandelier, the fun really begins. I remember sitting on my porch one evening, admiring my first creation, when I thought, “What else could I do with this concept?” That curiosity led to some of my favorite DIY solar light projects to date.
For camping enthusiasts, consider building a portable camping chandelier. Use a collapsible wire frame or lightweight aluminum structure that folds flat for transport. Attach solar stakes or small panel lights with carabiners for easy setup and takedown. I’ve taken mine on three camping trips now, and it transforms any campsite into a cozy gathering space without disturbing nature with harsh electric lights.
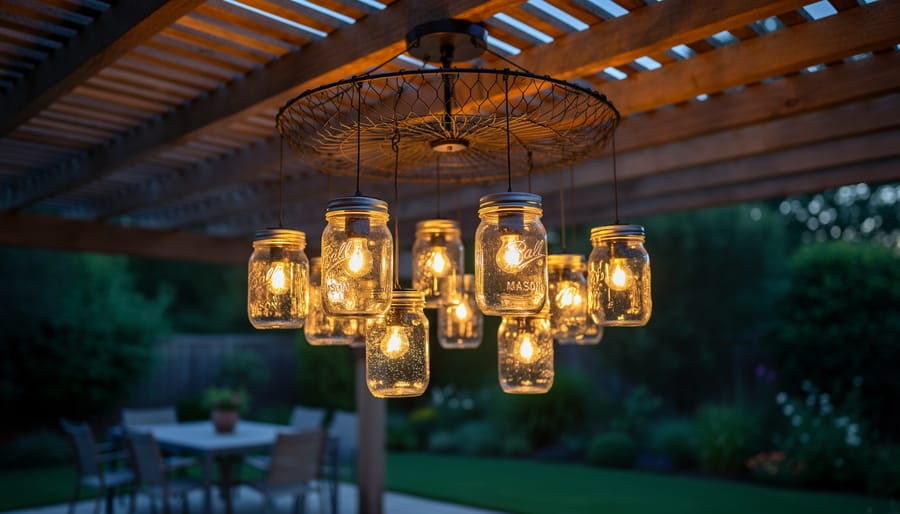
Mason jar chandeliers offer rustic charm perfect for weddings or garden parties. Simply drill small holes in jar lids to accommodate solar stake lights, then hang the jars at varying heights from a circular wire frame. The glass diffuses the light beautifully, creating a warm ambiance that guests always comment on.
Want to get technical? Adding a dimmer switch to your chandelier gives you control over brightness levels. Most solar systems operate on low voltage DC current, making it safe to integrate simple inline dimmers designed for LED strips. Position the dimmer between your solar panel and lights for easy access.
For the tech-savvy, smart controls take things further. Small solar charge controllers with Bluetooth connectivity let you program on-off times or adjust brightness from your phone. These controllers typically cost between fifteen and thirty dollars and connect inline with your existing setup. The learning curve is minimal, and the convenience factor is huge for those unexpected evening gatherings.
Solar chandelier designs range from rustic mason jar styles to elegant crystal versions, each bringing unique character to outdoor spaces.
Troubleshooting Common Issues
Even the best-planned solar chandelier can hit a few snags, and trust me, I’ve been there! Let me walk you through the most common issues and how to fix them.
If your lights aren’t turning on at all, first check the obvious culprits. Make sure the on/off switch is in the correct position—I once spent twenty minutes diagnosing a “broken” chandelier before realizing I’d left the switch off! Next, verify that your solar panel isn’t covered or shaded. Even partial shade can prevent charging. Also check that all wire connections are secure and haven’t come loose during installation.
For dim or flickering bulbs, the battery is usually the issue. Solar batteries lose capacity over time, especially if they’ve been through a few winters. Try charging the battery with a separate charger to see if it holds a full charge. If it doesn’t, replacement batteries are inexpensive and readily available online. Also ensure your solar panel is clean—a layer of dust or pollen can reduce charging efficiency by up to 30 percent.
When batteries won’t charge properly, inspect the solar panel for damage or corrosion on the connections. Water damage is a sneaky culprit here. Even “waterproof” connections can fail if not properly sealed. I learned this the hard way during a particularly rainy spring! Apply dielectric grease to all connection points and ensure your solar panel faces south (in the Northern Hemisphere) with no obstructions.
Weather-related failures often stem from inadequate weatherproofing. If your chandelier stops working after rain, water has likely infiltrated the electrical components. Disassemble carefully, let everything dry completely, then reseal with better-quality silicone or heat-shrink tubing.
For comprehensive guidance on troubleshooting solar lights, checking voltage with a multimeter helps pinpoint exactly where power is being lost in your system. This simple diagnostic step saves hours of guesswork!
You’ve made it through the entire process, and I hope you’re feeling excited about your DIY solar chandelier project! Here’s the thing I’ve learned after years of tinkering with solar projects: you don’t need fancy equipment or a hefty budget to create something beautiful and functional. Start with what you have. Maybe that’s just a few mason jars and some basic solar garden lights from the dollar store. That’s perfectly fine. My first attempt used recycled materials from my garage, and it still hangs on my back porch today.
The beauty of this project is that it grows with you. Begin simple, see how it performs, then add upgrades as you learn what works best for your space. Maybe you’ll discover your chandelier needs more light output, or perhaps you’ll want to experiment with different hanging heights. Each adjustment teaches you something new about solar energy and your own creativity.
I’d love to see what you create! The Spheral Solar community thrives on sharing ideas, troubleshooting challenges together, and celebrating each other’s successes. Post photos of your finished chandelier in our community forum, share the unique twists you added, or ask questions if you hit any snags along the way. Your experience might inspire someone else to take that first step, just like countless community members inspired you to start this journey. Let’s keep building this solar-powered movement together, one DIY project at a time.
How useful was this post?
Click on a star to rate it!
Average rating 0 / 5. Vote count: 0
No votes so far! Be the first to rate this post.
We are sorry that this post was not useful for you!
Let us improve this post!
Tell us how we can improve this post?
charlesnoble
Here at Spheral Solar, I’m a hands-on solar power enthusiast, constantly exploring and experimenting with DIY solutions. I’m dedicated to sharing my discoveries, insights, and even the bumps I hit along the way, all in the pursuit of a more sustainable future.
30 DIY Solar Light Ideas to Enhance Your Outdoor Décor by Charlesnoble July 24, 2022 Whether it is a garden party, holiday barbeque, or just your family enjoying your outdoor living spaces, solar lights installed in the area can brighten the night and add a flair of festive good cheer to any outdoor space. We managed to find some of the best DIY solar light…
8 Best Solar Christmas Lights in 2023 by Nick September 1, 2021 There are so many elements in choosing the best solar Christmas lights that it’s easy to lose sight of their importance. Yes, colors and flash modes, slow to fast, are excellent. But the top pick would be a combination of the most reliable one, the most durable one, and the…
Wire Your Motion Sensor Switch to Ignore False Triggers by Charlesnoble March 15, 2026 Wire your motion sensor switch by identifying the three critical connections: line (incoming power), load (outgoing to light fixture), and neutral. Connect the black wire from your power source to the sensor’s line terminal, the red or black load wire to your light fixture, and join all white neutral wires…
10 Best Outdoor Solar Lights in 2023 by Adeyomola August 30, 2021 You will get the best experience with outdoor solar lights when you opt for lights with good solar panels and long lighting times. But besides that, ensure your choice can charge quickly and offers sufficient brightness. Such a selection will give you a complete experience. Best Solar Lights for Outdoors…
9 Best Solar Step Lights in 2023 by Nick September 12, 2021 Whether for aesthetic purposes or protection while walking up your steps at night, having solar step lights covering every step is a necessity. On top of the added protection, these solar lights should also look incredible. There is nothing sleeker than a low spread of protective lighting. Best Solar Step…
11 Best Solar String Lights in 2023 by Nick March 10, 2022 Solar string lights are a great way to add a bit of light and aesthetics to an area. They provide ample outdoor lighting and customized lighting options, have the ideal string length, and have a long enough battery life to last the night. If solar lights are to be used…
Subscribe for handpicked DIY projects, exclusive tips, and giveaways.
Match your solar panels to microinverters or power optimizers based on your roof’s shading patterns—even partial shade from a chimney or tree during morning hours means module-level power electronics will recover 15-25% more energy than string inverters lose to the weakest panel. Install power optimizers when you’re working with mixed panel orientations across multiple roof… Read more: Why Smart Solar Modules Could Save Your DIY Array (Before It’s Too Late)
Measure your conduit run before purchasing materials by mapping the exact path from your solar array to the inverter and battery location, accounting for a 10% waste factor and additional length for bends. PVC electrical conduit remains the most cost-effective protective solution for DIY solar installations, but improper installation creates fire hazards, code violations, and… Read more: Why Your Solar Conduit Installation Could Start a Fire (And How to Do It Right)
Walk down to your nearest stream with a five-gallon bucket and a stopwatch. Fill that bucket and time how long it takes—this simple test reveals whether you have enough flowing water to power your off-grid home. If you can fill it in under 10 seconds from a source that drops at least 10 feet in… Read more: The Stream Behind Your House Could Power It (Here’s How Micro Hydro Works)