How to Build a Solar Powered Outdoor Table for Your Camping Setup
Updated:
Building a solar powered outdoor table takes about 8 to 12 hours and requires basic woodworking skills plus some familiarity with electrical connections. You’ll mount solar panels directly onto a custom-built or modified outdoor table, wire them to a charge controller and battery system housed underneath, and add USB ports or AC outlets for charging phones, laptops, and small appliances right at your patio or campsite.
I’ve been tinkering with solar projects for over a decade, and this one has become my go-to recommendation for people who want something practical that actually gets used every day. My own solar table on the back deck has charged everything from power tools during weekend projects to keeping the cooler running during summer barbecues. The beauty of this build is that you’re creating furniture that works double duty: a functional outdoor surface that happens to generate clean energy whenever the sun is out.
The concept is straightforward. Solar panels capture sunlight and convert it to electricity, which flows through a charge controller to prevent overcharging, then stores in a deep-cycle battery for use anytime. You tap into that stored power through outlets mounted on the table’s edge or leg. The entire system tucks neatly into the table structure, so you’re not dealing with separate components scattered across your yard.
This guide walks you through every stage, from selecting the right size panels and calculating your power needs to cutting the wood, wiring the components safely, and testing the finished product. Whether you’re outfitting a permanent backyard setup or building a portable camping table, you’ll have a reliable off-grid power station that pays for itself in convenience alone.
Key Takeaway: Solar powered outdoor tables combine portable power generation with practical furniture, giving you USB and 12V charging anywhere without electrical outlets. The integrated design protects components from weather while keeping your power source at a convenient working height.
What Makes a Solar Powered Outdoor Table Different
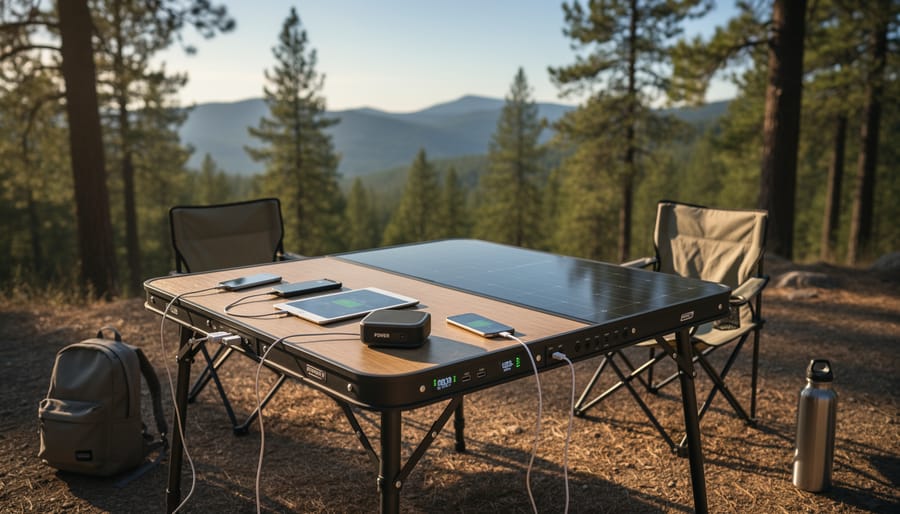
A solar-powered outdoor table set up at a campsite shows how integrated charging ports and a built-in solar panel turn the table into usable off-grid power.
A solar powered outdoor table isn’t just regular camping furniture with a panel slapped on top, it’s a thoughtfully integrated power system that happens to double as a functional surface. The key difference lies in how these tables combine structural design with electrical components to create a completely self-contained charging station you can set up anywhere the sun shines.
At the heart of any solar table is the photovoltaic panel itself, typically a monocrystalline or polycrystalline unit ranging from 20 to 100 watts depending on the table size. This panel sits flush with or slightly recessed into the table surface, angled to catch sunlight while maintaining a usable tabletop around its edges. Unlike portable panels you’d lay on the ground, the integrated design keeps your charging setup at a convenient height and protects the panel from foot traffic and ground moisture.
The second critical component is the battery storage system, usually a 12V deep-cycle or lithium battery tucked into a ventilated compartment beneath the table surface. This battery stores the energy your panel generates during the day, so you’ve got power available after sunset or on cloudy afternoons. Most DIY builds use batteries in the 20 to 50 amp-hour range, which translates to charging multiple phones, running LED lights for hours, or powering a small 12V cooler.
What makes these tables practical for camping is the output configuration. Quality builds include multiple USB ports (usually 5V at 2-3 amps each) plus one or more 12V cigarette-lighter style outlets, all accessible from the table edge. This means you can charge phones, tablets, cameras, portable speakers, and camp lights without adapters or guesswork. A well-designed 50-watt table system can generate roughly 200-250 watt-hours per sunny day, enough to fully charge 4-5 smartphones or keep essential devices running throughout a weekend camping trip.
Tools and Materials You’ll Need
Before you start cutting or wiring, gather everything you’ll need. Having all your materials and tools on hand prevents mid-project trips to the hardware store and helps you spot any missing pieces early.
Table Construction Materials
For the table itself, you’ll need lumber that can handle outdoor conditions. I recommend marine-grade plywood or cedar for the tabletop (at least 3/4″ thick), pressure-treated 2x4s for the frame and legs, stainless steel or galvanized screws and bolts, wood glue rated for exterior use, and a weatherproof finish like outdoor polyurethane or teak oil. Budget around $50-80 for quality lumber and hardware from your local home improvement store.
Solar System Components
The electrical heart of your table requires these specific items:
100W flexible or semi-rigid solar panel (around $100-150 online)
20A PWM or MPPT solar charge controller ($25-60 depending on type)
12V 20Ah AGM or lithium battery ($60-120, higher for lithium)
Dual USB charging ports with 12V cigarette lighter socket ($15-25)
Waterproof junction box for electronics housing ($10-15)
14-gauge outdoor-rated wire, 10-20 feet ($8-12)
Inline fuse holder with 15A fuse ($5-8)
Cable glands and waterproof connectors ($10-15)
Silicone sealant rated for outdoor use ($6-10)
You’ll find solar components at online retailers like Amazon, specialized solar suppliers, or renewable energy shops. Don’t cheap out on the charge controller, it protects your battery from overcharging and extends its life considerably.
Tools Required
For construction, you’ll need a circular saw or miter saw, drill with bits and drivers, jigsaw for cutting the panel recess, measuring tape and square, sandpaper or orbital sander, and paintbrushes for finish. On the electrical side, grab wire strippers, a multimeter for testing voltage, screwdrivers, and a utility knife. Most DIYers already own these basics, but if you’re borrowing or renting, factor that into your planning timeline.
Safety Warnings and Precautions
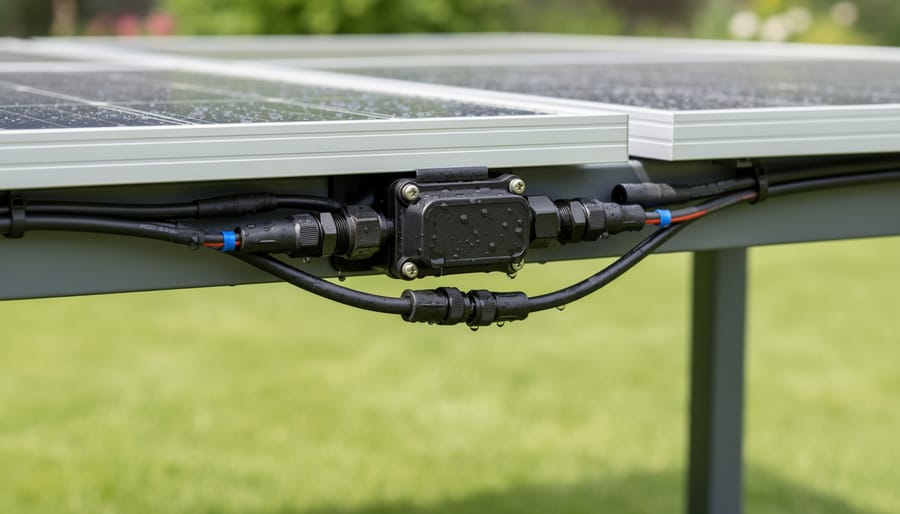
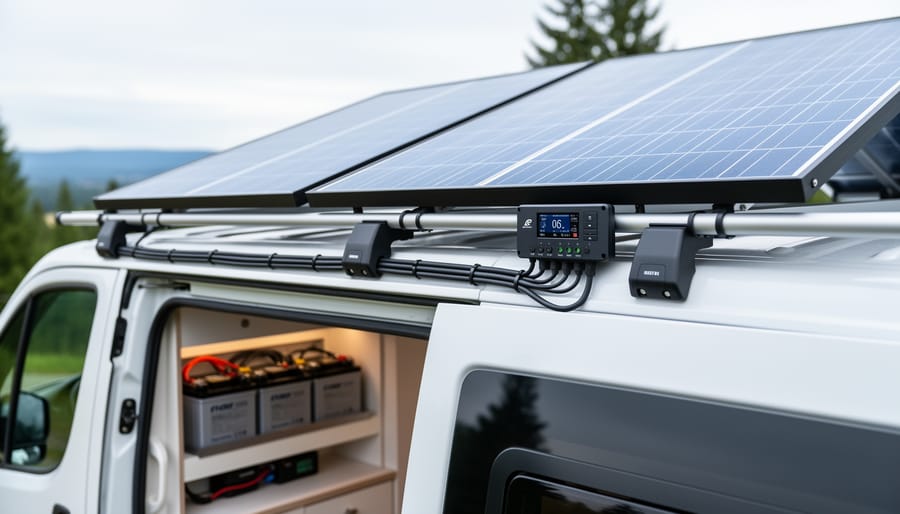
Close-up detail of solar power wiring components helps readers visualize what goes into making a weather-ready solar table system.
Before you power up your drill, let’s talk about what can go wrong. Working with solar components outdoors introduces unique hazards that don’t exist with regular furniture builds.
First, respect your battery. Even a small 12V battery stores enough energy to weld metal if you short-circuit the terminals. I once dropped a wrench across my battery posts and watched it glow red-hot in under two seconds. Always disconnect the battery before wiring anything, and never work with metal jewelry or tools that could bridge the terminals. Lead-acid batteries also vent hydrogen gas during charging, so your battery compartment needs proper ventilation holes, never a sealed box.
Warning: Always install inline fuses on both positive battery connections and ensure all outdoor electrical connections use waterproof enclosures rated for wet locations to prevent shock hazards and fire risk.
Water and electricity make a dangerous combination. Every connection point, every wire entry into your electrical compartment, and every seam around your solar panel needs proper sealing. Rain will find any opening you leave. Use marine-grade silicone sealant and waterproof cable glands, not just electrical tape wrapped around a hole. When dealing with higher-voltage systems or if you’re adding inverter best practices to your setup, the stakes get higher.
If your design includes more complex charging systems, understanding DC-to-DC charger sizing becomes critical for both efficiency and safety. Know your limits. If you’re uncomfortable working with electrical components or your design calls for anything above 24V, hire a licensed electrician for at least the wiring portion. There’s no shame in getting professional help for the technical bits while handling the woodworking yourself.
Step-by-Step: Building Your Solar Powered Table
Step 1: Design and Cut Your Table Frame
Start with your solar panel dimensions, they’ll dictate everything else. For a typical 50W panel (around 26″ × 20″), you’ll want a table top at least 30″ × 24″ to create a 2-inch border around the recessed cavity. This border provides structural strength and prevents warping.
Mark your panel cavity ½-inch larger than the panel itself (for easier fitting and thermal expansion) and plan a ¾-inch recess depth. Use a router or circular saw set to this depth to create the cavity before assembly, it’s nearly impossible to cut accurately afterward.
For the legs, 24-28 inches works well for standard seating height. Cut them from pressure-treated 2×4s or 4×4s, depending on how much weight you plan to support. I learned the hard way that skimping on leg thickness leads to wobble once you add a 15-pound battery underneath.
Keep your center of gravity in mind: the battery compartment should sit low and centered. If your design places the battery toward one end, extend the legs slightly on that side or add cross-bracing between them. A stable base matters more in outdoor settings than you’d think, uneven ground will expose any structural weaknesses immediately.
Cut all pieces before assembly and dry-fit everything to verify your measurements.
Step 2: Assemble the Table Structure
With your frame pieces cut to size, it’s time to join them into a sturdy outdoor structure. Start by pre-drilling pilot holes for all screws, this prevents splitting and gives you much stronger joints that won’t work loose over the seasons.
Use exterior-grade wood screws (at least 2.5 inches for leg-to-apron connections) and apply waterproof wood glue to all mating surfaces before fastening. For the corners where the apron boards meet, drive screws at angles through both faces to lock the joint tight. I reinforce each corner with a galvanized steel corner bracket on the inside; it adds maybe ten minutes to the build but doubles the rigidity when you’re moving the table around camp.
The panel recess requires careful attention. Route or chisel a lip around the top opening that’s slightly deeper than your solar panel’s thickness, this creates the recessed cavity that protects the panel edges and sets up proper waterproofing later. Make sure the recess bottom is perfectly flat so the panel sits flush without air gaps.
Once assembled, sand all surfaces smooth and apply two coats of exterior wood finish (marine spar varnish works brilliantly). Let each coat cure fully before handling.
Step 3: Mount the Solar Panel
With your table frame assembled and finished, you’re ready to secure the solar panel into the recessed cavity you created. This step determines how well your table captures sunlight and how long the panel will last outdoors.
Start by dry-fitting the panel into the recess to confirm the fit. The panel should sit flush with slight clearance around all edges, about 1/8 inch works well for expansion and contraction. If your recess is slightly larger than the panel, that’s perfect for allowing drainage.
Apply a bead of marine-grade silicone adhesive around the inside edge of the recess, about one inch from the outer rim. Place small dabs of silicone at four to six points across the bottom surface as well. These dabs cushion the panel and prevent pressure points that could crack it over time.
Carefully lower the panel into position and press firmly for ten seconds. The silicone creates both a weatherproof seal and a shock-absorbing mount. For added security on portable tables, install four L-brackets at the corners using stainless steel screws. Position brackets so they grip the panel frame without covering any solar cells.
Leave the panel surface proud of the table by about 1/4 inch. This slight elevation prevents water pooling and makes cleaning easier, you’ll simply wipe debris off rather than digging it out of a sunken well.
Step 4: Install the Electrical Components
Start by mounting your charge controller inside the table’s electrical compartment. Position it on a vertical surface where you can easily access the terminals and view the LED indicators. Use stainless steel screws to secure it firmly, vibration during transport can loosen connections over time.
Next, create a separate ventilated battery compartment. This is crucial because batteries release gases during charging. I learned this the hard way when my first sealed compartment bulged after a hot afternoon of charging. Drill ventilation holes on opposite sides of the battery bay to allow airflow, then mount the battery securely using nylon straps or a battery box. The battery should sit low in the table for stability, but not so low that it contacts the ground when the table sits on uneven terrain.
Now install your USB and 12V outlets where you’ll actually use them. I mount mine on the table’s edge near where I typically sit, making it easy to plug in a phone or camp light without crawling under the table. Use panel-mount waterproof outlets rated for outdoor use, the marine-grade versions with spring-loaded covers work brilliantly.
Mount everything using waterproof junction boxes for wire connections. Thread cables through cable glands (also called strain reliefs) wherever wires enter or exit a compartment. These rubber grommets prevent water from following the wire into sealed areas and protect against wire chafing as the table moves. Tighten them snugly, but don’t overtighten and damage the cable insulation.
Leave yourself a few extra inches of wire at each connection point for future maintenance.
Step 5: Connect and Wire the System
Wiring your solar components in the correct sequence prevents damage and ensures safe operation. Always connect in this order: solar panel to charge controller first, then controller to battery, and finally controller to your USB and 12V outlets.
Start by connecting the solar panel leads to the controller’s PV (photovoltaic) input terminals. Double-check polarity with a multimeter before tightening connections, red to positive, black to negative. Next, attach the battery to the controller’s battery terminals, again verifying polarity. The controller needs to sense the battery voltage before you connect any loads. Finally, wire your output ports to the load terminals on the controller.
Install a fuse (15-20 amp recommended) on the positive wire between the battery and controller, positioned as close to the battery as possible. This protects against shorts and overload.
For outdoor durability, use marine-grade heat shrink on all wire connections and secure cables with zip ties or cable clips to prevent movement that can cause wear. Create drip loops where wires enter compartments so water runs off rather than following the cable inside. Leave slight slack at connection points to handle wood expansion and contraction through weather changes.
Test each connection with a multimeter before closing up compartments, you’ll save yourself headaches later.
Step 6: Weatherproof All Connections
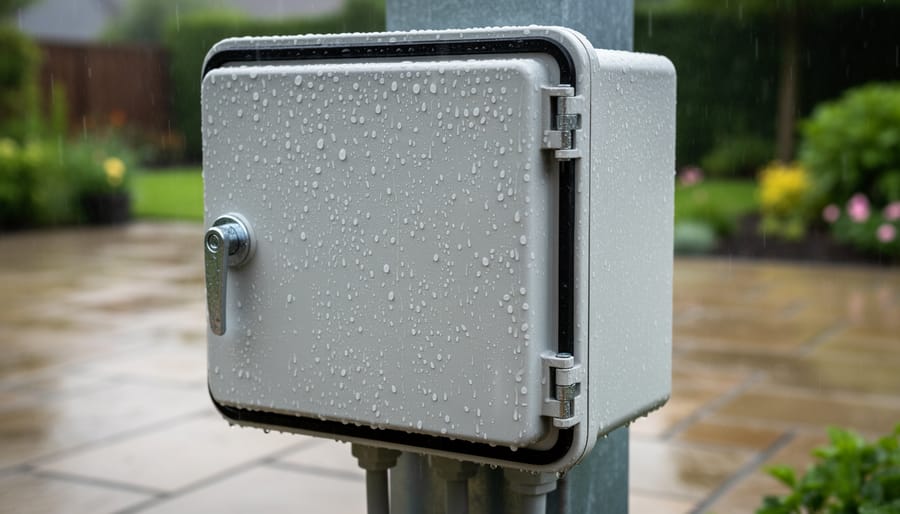
Your solar table will live outdoors through rain, dew, and temperature swings, so weatherproofing isn’t optional, it’s what separates a functional build from a fried circuit board. I learned this the expensive way when a “water-resistant” junction box filled with condensation after one humid night.
Start with the solar panel perimeter. Run a continuous bead of marine-grade silicone sealant around the entire edge where the panel meets the table recess. Press it into the gap with a gloved finger, creating a smooth seal that slopes away from the panel. This keeps water from wicking underneath.
Next, seal every point where wires enter or exit compartments. Apply silicone generously around cable glands and push fittings, water will find any gap you leave. For the battery compartment, check that all ventilation holes face downward so rain can’t enter while allowing gases to escape safely.
Finally, test everything with a garden hose before you trust it outdoors. Spray the table from multiple angles for a full minute, then open compartments and check for moisture. Any dampness means you’ve got a leak to fix. Let the table dry completely, reseal problem areas, and test again. Patience here saves replacing components later.
Raindrops visibly bead on the panel and sealed surfaces, illustrating the importance of weatherproofing for safe outdoor use.
Testing and Verifying Your Solar Table Works
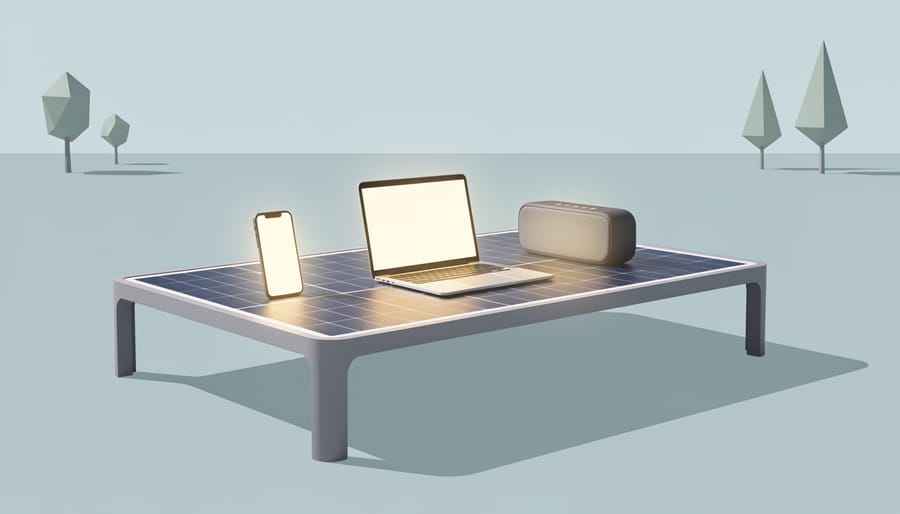
Powered devices glowing on the solar table convey the real-world benefit of generating electricity outdoors where outlets aren’t available.
Before you invite friends to marvel at your new creation, you need to confirm everything works as intended. Testing catches wiring errors early, prevents damage to connected devices, and gives you confidence that your solar powered outdoor table will perform reliably at your campsite.
Start with the multimeter set to DC voltage. With the solar panel exposed to direct sunlight, measure the voltage at the charge controller’s solar input terminals, you should see 18-22 volts from a typical 100W panel. Next, check the battery terminals; a fully charged 12V battery reads between 12.6-12.8 volts. If these readings are off, verify your connections match the polarity markings and that all fuses are intact.
Now test the charging function. Cover the panel completely with a blanket, note the battery voltage, then uncover it. Within a few seconds, the charge controller’s indicator lights should show active charging, and your battery voltage should gradually climb if it wasn’t already full. This confirms the charging circuit works properly.
Run through this complete verification checklist:
Measure open-circuit voltage at solar panel terminals (expect 18-22V in full sun)
Confirm battery voltage reads 12.6-12.8V when fully charged
Verify charge controller LED indicators respond to sunlight
Plug a USB device into each port and confirm it charges
Test 12V outputs with a car charger or lamp
Spray all sealed compartments with a garden hose and check for water intrusion
For the load test, plug in your phone or a small USB fan and let it run for an hour while monitoring battery voltage, a slight drop is normal. If voltage plummets quickly, you may have a weak battery or incorrect charge controller settings.
The waterproofing spray test is critical. Use a garden hose on a moderate spray setting and thoroughly wet all sealed areas, especially around the panel edges and electrical compartment doors. Wait fifteen minutes, then open each compartment and inspect for moisture. Any water inside means you need to reapply silicone sealant and test again before taking the table outdoors.
Next Steps: Optimizing and Using Your Solar Table
Position your finished table where it’ll catch direct sunlight for at least 4-6 hours daily, south-facing placement works best in the northern hemisphere. Avoid shadows from trees, buildings, or canopies that can dramatically reduce charging efficiency.
Your table can comfortably power small devices like phones, tablets, portable speakers, and LED lights. A 100-watt panel with decent battery storage handles USB devices easily. For 12V loads like camping fans or small coolers, check your total draw, knowing mini fridge amps helps prevent draining your battery overnight. Stick with devices drawing under 3-5 amps continuous for reliable performance.
Clean the panel surface monthly (or weekly in dusty conditions) with a soft cloth and water. Dust and grime cut efficiency by 20% or more. Every few months, check wire connections for corrosion, tighten terminal screws, and inspect weatherproofing seals. If you used a lead-acid battery, monitor water levels; lithium batteries need less maintenance but benefit from occasional voltage checks.
Want more capacity? Add a second battery in parallel for longer runtime, or mount an additional panel on a fold-out extension for double the charging speed. Some builders integrate a small inverter for AC outlets, though this adds complexity. Others add a voltage display or Bluetooth monitor to track performance in real time, both are simple upgrades that make your solar powered outdoor tables even more functional.
Common Questions About DIY Solar Tables
How much does it cost to build a solar powered outdoor table compared to buying one?
A DIY build typically costs $200-400 depending on materials and solar capacity, while commercial solar tables run $500-1200. You’ll save money and can customize the power output to match your actual needs rather than accepting preset configurations.
How much power can I realistically expect from my solar table?
Most DIY builds using a 50-100W panel can charge phones, tablets, LED lights, and small 12V devices. You won’t power a full cooler or laptop all day, but you’ll easily keep essential electronics charged during weekend camping trips.
Will my solar table work in winter or cloudy conditions?
Yes, but expect 20-50% of summer output on overcast days and minimal charging in heavy shade. The battery storage means you can charge during any sunny period and use that power later, making the system useful year-round with adjusted expectations.
Is a solar table portable enough for camping trips?
Absolutely. Build with lightweight lumber and use handles or folding legs to make transport easier. Most DIY solar tables weigh 25-40 pounds, making them manageable for car camping and perfect companions for solar tent setups.
Can I expand the system later with more panels or battery capacity?
Yes, that’s one advantage of DIY builds. You can add parallel solar panels to increase charging speed or upgrade to a larger battery for more storage. Just ensure your charge controller can handle the additional capacity.
The Spheral Solar community constantly shares creative modifications to their solar table builds. Some members mount additional panels on hinged frames that fold out for extra charging capacity, while others integrate wireless charging pads into the table surface for modern convenience. Charles has seen builders add voltmeters, built-in tool storage compartments, and even small inverters for AC outlets, though he recommends starting simple and adding features as you learn what works for your camping style. The beauty of building your own system is that it grows with your needs rather than locking you into someone else’s design choices.
Building your own solar powered outdoor table transforms camping and outdoor activities from a compromise on modern conveniences into a genuinely self-sufficient experience. You’ve created a piece of functional furniture that generates clean power wherever you set up, whether that’s a weekend campsite or your backyard patio. This project sits at the heart of practical solar power solutions for camping, it proves you don’t need expensive commercial gear to harness the sun’s energy outdoors.
I’ve built three of these tables over the years, each one teaching me something new about weatherproofing or power management. The real satisfaction isn’t just the free electricity; it’s knowing exactly how your system works because you assembled every connection yourself.
Share photos of your completed solar table in the Spheral Solar community, we love seeing different designs and creative solutions. And if you’re planning your next solar project, try our solar calculator tools to size panels and batteries for your specific needs. Once you’ve built one solar-powered piece, you’ll start seeing possibilities everywhere.
How useful was this post?
Click on a star to rate it!
Average rating 0 / 5. Vote count: 0
No votes so far! Be the first to rate this post.
We are sorry that this post was not useful for you!
Let us improve this post!
Tell us how we can improve this post?
charlesnoble
Here at Spheral Solar, I’m a hands-on solar power enthusiast, constantly exploring and experimenting with DIY solutions. I’m dedicated to sharing my discoveries, insights, and even the bumps I hit along the way, all in the pursuit of a more sustainable future.
How to Wire a 7-Way RV Plug: Step-by-Step Diagram… by Charlesnoble September 12, 2026 Wiring a 7-pin RV plug correctly connects your tow vehicle to your trailer’s lights, brakes, and auxiliary power in about 45 minutes with basic hand tools and careful attention to the color-coded wire standard. The diagram follows a specific layout mandated by the RV Industry Association: each pin controls a…
How to Use an 8 Wire Crimper for Solar Panel and… by Charlesnoble September 24, 2026 Crimping 8-gauge wire correctly takes about 2 minutes per connection once you’ve got the hang of it, but those two minutes make the difference between a solar installation that lasts 25 years and one that fails in the first storm. An 8-gauge wire crimper is a heavy-duty hand tool designed…
6 Best Solar Spot Lights of 2026, Tested and Reviewed by Charlesnoble August 8, 2026 After testing dozens of solar spotlights in real-world conditions throughout 2026, the AloftSun Solar Motion Sensor Outdoor Lights emerged as the top overall choice for most homeowners, thanks to its reliable performance and versatility across different landscape lighting scenarios. But picking the right solar spotlight depends entirely on what you’re…
How to Install a Solar Heating System for Your… by Charlesnoble August 25, 2026 You can heat your inground pool with solar panels mounted on your roof, garage, or ground rack, capturing free energy from the sun and extending your swim season by months while slashing heating costs to nearly zero. A properly sized solar heating system circulates pool water through black collector panels…
Why Two Solar Panels Beat One Every Time (Parallel… by Charlesnoble June 22, 2026 Connect your panels to a charge controller or battery system by running positive terminals to positive and negative to negative. This parallel configuration doubles your available current (amperage) while keeping voltage the same, which is exactly what you need when your system demands more power than a single panel can…
5 Sources of Electrical Energy Every Solar DIYer… by Charlesnoble July 1, 2026 Electricity powers our homes from five main sources: solar panels, wind turbines, hydroelectric generators, fossil fuel generators, and battery storage systems. If you’re building a reliable off-grid setup or backing up your solar array, understanding how these sources work together transforms a single-point-of-failure system into resilient, year-round power. I learned…
Subscribe for handpicked DIY projects, exclusive tips, and giveaways.
There is something special about a mature tree. Decades of growth, shade that actually cools the house, branches that the kids climbed, a root system that has quietly held the yard together through every storm. So when circumstances force a move, whether it is a home renovation, a new driveway, or a construction project that… Read more: How to Move a Mature Tree Without Killing It: The Complete Relocation Guide
A mass energy conversion calculator lets you determine how much energy is locked inside any amount of matter using Einstein’s famous equation E=mc². Whether you’re working on a physics assignment or simply curious about the enormous energy potential in everyday objects, the calculation itself takes just seconds once you understand the formula’s three components: energy… Read more: How to Use a Mass Energy Conversion Calculator (Step-by-Step Guide)
Low voltage circuit protection in DIY solar systems boils down to matching the right fuse or breaker to your wire size and expected current, not to the capacity of your battery bank or inverter. Most fires and equipment failures happen when people oversize protection devices, thinking bigger is safer, when the opposite is true. Your… Read more: How to Size Low Voltage Circuit Protection for Your DIY Solar System